
Attaching a camera to a tripod might seem simple, but doing it correctly is crucial. When you attach a camera to a tripod properly, it ensures sharp photos, smooth videos, and reliable framing every time. A tripod is more than a stand. It is your camera’s silent partner, supporting it while you focus on creativity.
Learning how to mount a camera on a tripod safely gives you control over angles, height, and motion. With the right technique, you will save time, avoid mistakes, and always get professional results.
Learn how to attach a camera to a tripod step by step, including choosing the right tripod, mounting systems, leveling, balancing, smooth movement, and safe removal for stable, professional shots.
This guide teaches you how to attach a camera to a tripod step by step, covering every detail for beginners and pros alike. Whether you are shooting landscapes, vlogs, or low-light scenes, a correct camera tripod setup improves stability and prevents damage.
Why Using a Tripod Is Important for Camera Stability

A tripod is essential for camera stability. Handheld shots can introduce micro-movements that blur images or cause shaky videos. A tripod for camera stability eliminates these problems. It allows long exposures, sharper focus, and consistent framing. This is especially useful for night photography, landscapes, and vlogs.
Using a tripod also reduces fatigue. You can compose your shot without holding the camera for long periods. This improves your workflow and ensures better camera tripod mounting. Even small trips or sudden movements can compromise your shot if the camera isn’t stable, so investing time in proper setup pays off.
What makes using a camera tripod so helpful?
When you mount a camera on a tripod, you gain control over movement. Tripods support accessories like lights, monitors, or microphones. This setup is useful for multi-angle shooting. A properly mounted camera avoids blur, keeps focus sharp, and lets you try advanced techniques like panoramas or timelapses without worry.
When a tripod significantly improves image quality
A landscape photography tripod helps achieve sharp horizons. A low-light photography tripod helps reduce blur at slow shutter speeds. Video creators using a vlogging tripod can move smoothly while keeping the camera stable. In all cases, a tripod turns ordinary shots into professional results.
Choosing the Right Tripod for Your Camera
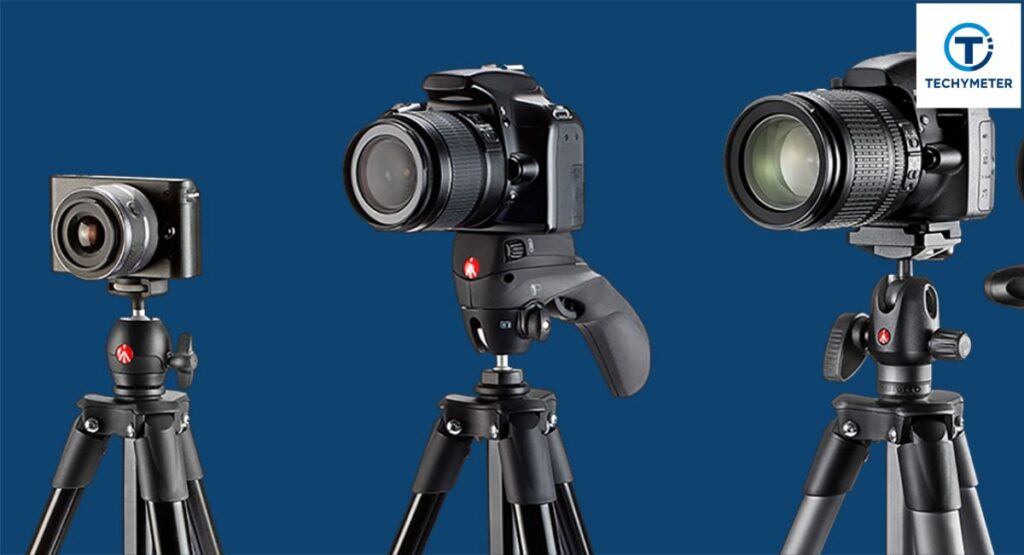
Choosing the right tripod is vital for safety and stability. Not all tripods support every camera type. A mini tripod works for compact cameras, while a video tripod or DSLR tripod mount supports heavier gear. Knowing your camera’s weight and mount type helps you pick the right tripod.
Different tripods are designed for different tasks. Flexible tripods can wrap around poles or trees. Heavy-duty tripods support long lenses and video setups. Picking the right type ensures proper camera tripod setup and avoids camera damage.
Know that tripods are not all the same
Tripods vary by head type, weight capacity, and leg design. A ball head tripod allows fast adjustment and smooth movements. A pan-and-tilt head is ideal for video and precise framing. Each design affects smooth camera movement, pan movement, and tilt adjustment.
Matching tripod size and load capacity with your camera
Always respect the tripod’s weight capacity. Overloading weak tripods can cause collapse. For a DSLR or mirrorless camera, ensure the tripod supports the camera, lens, and accessories. This ensures a secure tripod setup and prevents tipping outdoors.
Understanding the Parts of a Camera Tripod

A tripod is made of several essential components. Legs, leg locks, a center column, and the tripod head all contribute to tripod balance. The camera mounting plate connects to your camera via a tripod screw, which fits a tripod mount hole. Understanding these parts helps avoid mistakes.
The center column allows center column adjustment, and the legs can be extended for tripod base stability. Knowing the anatomy of your tripod improves camera tripod mounting, movement control, and overall safety.
What are the parts of a camera tripod?
Legs, leg locks, center column, support braces, and tripod head are the main parts. The tripod mounting plate attaches to the camera. Screws include 1/4 inch tripod screw or 3/8 inch tripod screw, depending on your camera’s threaded tripod mount.
How tripod parts affect balance and movement
Proper leg placement and head adjustment ensure tripod balance. A poorly adjusted tripod can tilt or wobble. The tripod plate direction and head type also affect smooth camera movement. Choosing the right components improves stability and reduces errors.
Preparing Your Camera and Tripod Before Mounting
Preparation is key to a smooth camera tripod setup. Place your tripod on a stable, level surface. Make sure all leg locks are secure, the tripod head moves freely, and the quick-release plate is ready. Lay out your camera, lens, and accessories nearby to avoid rushing during mounting. Checking your gear first ensures a safe and secure tripod setup every time.
Preparing your equipment
Before you mount a camera on a tripod, ensure the camera is off or in safe mode. Attach lens caps or filters if needed. Keep the camera mounting plate ready. Proper preparation prevents camera shake and tripod balance issues, especially for delicate setups like low-light photography and tripod use.
Checking camera mount, lens direction, and tripod head
Verify the tripod plate direction matches the lens orientation. The lens should face forward, the tripod head should pivot smoothly, and the center column adjustment should be unlocked. Misalignment can cause awkward angles or even tip the tripod, risking camera damage.
Checking Whether Your Camera Has a Tripod Mount
Not every camera supports a tripod. Before attempting to attach the camera to the tripod, confirm your camera has a tripod mount hole. Most DSLRs and mirrorless cameras use a 1/4 inch tripod screw, while professional cameras sometimes require a 3/8 inch tripod screw. Checking first prevents frustration and ensures safe operation.
Ensure your camera has a tripod mount
Look underneath your camera for the threaded tripod mount hole. If missing, a mini tripod or clamp adapter may work temporarily. Ensuring compatibility allows smooth camera tripod mounting and prevents improper installation that could lead to camera shake or accidents.
Identifying the tripod screw hole correctly
Turn the screw gently into the threaded tripod mount to confirm fit. Tighten only until secure. Over-tightening can damage threads. A correctly identified screw prevents errors during how to mount a camera on a tripod.
Understanding Different Tripod Mounting Systems
Tripods can use different systems to attach your camera. Some use simple plastic mounting plates, others use professional Arca-Swiss mounts. Each type affects how fast and securely you can mount a camera on a tripod.
Attach a camera to a tripod with a plastic mounting plate
With a plastic mounting plate, you first attach the plate to the camera’s bottom, then carefully slide the plate into the tripod head. Finally, lock the tripod lever to secure the camera. This method is common on beginner and travel tripods.
Attach a camera with an Arca-Swiss mount
An Arca-Swiss tripod plate offers quick attachment and removal. Hold the plate flat, slide it into the dovetail clamp, and tighten the knob. The Arca-Swiss mount provides superior tripod balance for heavy DSLRs or professional video tripod setups.
Step-by-Step Guide to Mounting a Camera on a Tripod:
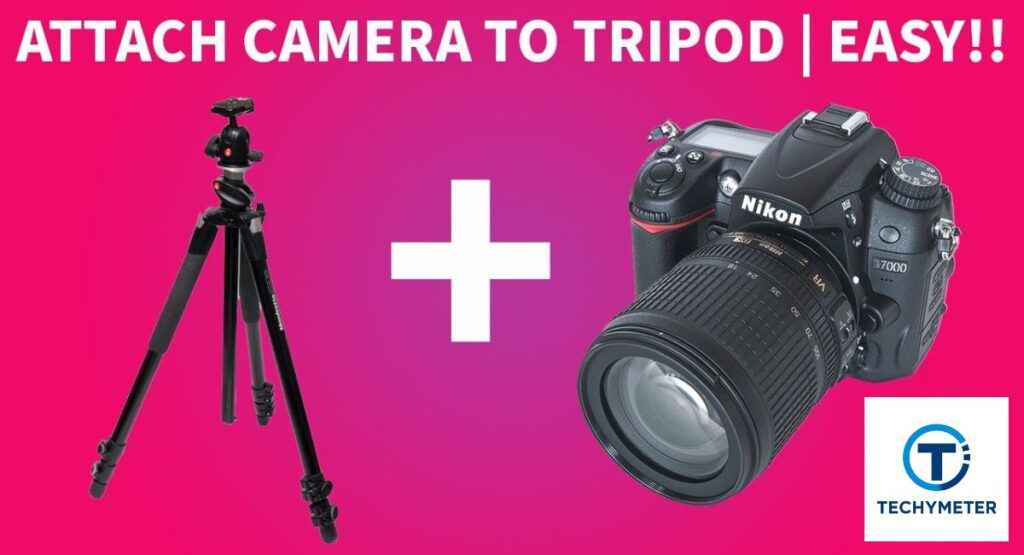
Learning how to attach a camera to a tripod step by step ensures safety and stability. The first two steps focus on handling the quick-release plate properly.
Step 1: Remove the quick-release plate first
Always remove quick release plate before mounting. Unlock the lever on the tripod head and carefully lift the plate off. This prevents awkward twisting and ensures you can later secure the camera on a tripod safely.
Step 2: Understand how the plate goes back
Examine the groove on your tripod head. The plate slides in one direction only. Align the short edge with the slot. The camera will stay steady when you lock the tripod lever and put the plate into the tripod head. Proper alignment prevents camera shake and incorrect angles.
Step 3: Attach the plate to the camera’s bottom
Turn your camera upside down and align the camera mounting plate with the tripod mount hole. Use the correct tripod screw, typically a 1/4 inch tripod screw for most cameras or a 3/8 inch tripod screw for professional DSLRs.
Slowly tighten the tripod screw until the plate is secure, ensuring the tripod plate direction faces forward. Proper alignment prevents lens misdirection and enhances camera stability.
Step 4: Mount the camera on the tripod
Hold the camera steadily, then carefully slide the plate into the tripod head. Engage the lever and lock the tripod lever to secure the camera on the tripod. Once locked, test stability by gently nudging the camera. A solid connection ensures safety, even during long landscape photography tripod sessions or heavy video tripod setups.
Step 5: Learn how to move the camera smoothly
Most tripods allow pan and tilt movements. Use the tripod handle or adjust a ball head tripod to achieve precise pan movement and tilt adjustment. Smooth adjustments prevent shaking and make framing easier. Always check the view on your camera or monitor before shooting, especially for vlogging, tripod, or professional video work.
Step 6: Recognize that tripods differ from one another
Tripods differ in heads and adjustment systems. Some have levers, others knobs. Understanding your tripod ensures proper camera tripod mounting. A pan and tilt head works well for video, while a ball head tripod allows quick angle changes for photos. Familiarity prevents mistakes and protects your gear during shoots.
Step 7: Use the center column to change the camera’s height
Use the center column adjustment to raise or lower your camera. Unlock the column, adjust slowly, and lock the tripod lever after finding the right height. This ensures perfect framing for landscape photography, vlogging tripod, or low-angle shots.
Step 8: To increase height and balance, extend your legs
Extend the tripod legs evenly to improve tripod base stability. Use leg locks or twist grips to secure each segment. Uneven legs can tilt the camera, harming camera stability. Outdoor shoots especially require careful leg adjustment to withstand wind or uneven surfaces.
Step 9: Control the tripod’s base with leg locks
Properly locked legs provide solid support. Flip each leg lock to secure the tripod. This maintains tripod balance and prevents tipping. For heavier setups, widening the tripod base lowers the center of gravity, ensuring safe operation with DSLRs or video rigs.
Step 10: Properly remove the camera from the tripod
When done shooting, always remove the camera from the tripod safely. Hold the camera firmly, unlock the tripod lever, and lift straight up. Avoid twisting or sudden movements to protect both the camera and the threaded tripod mount. Safe removal prevents accidents during travel or outdoor photography.
Step-by-Step Camera Mounting
| Step | Action | Key Tip |
| 1 | Remove quick release plate | Prevents twisting during setup |
| 2 | Understand plate direction | Ensures proper lens orientation |
| 3 | Attach the plate to the camera’s bottom | Use the correct tripod screw |
| 4 | Mount the camera on a tripod | Slide the plate into the tripod head |
| 5 | Move the camera smoothly | Adjust the pan & tilt head carefully |
| 6 | Know tripod type | Ball head vs pan & tilt affects motion |
| 7 | Adjust height | Use the center column adjustment |
| 8 | Extend legs | Maintain tripod base stability |
| 9 | Lock legs | Prevent tipping or wobbling |
| 10 | Remove the camera safely | Avoid twisting to protect the mount |
Leveling the Tripod for Stable and Straight Shots
Even a perfectly mounted camera can produce tilted shots if the tripod is uneven. Tripod leveling ensures accurate framing for photos and videos. Most tripods have built-in bubble levels. Adjust tripod legs until the base is level. A balanced setup improves camera stability and ensures clean horizons in landscape photography and tripod work.
To ensure that the tripod stands firmly on the ground, level it.
Check the tripod on flat ground. Adjust each leg for equal support. Uneven legs compromise tripod base stability and can damage the camera during long exposures or extended shoots. Proper leveling is critical for professional-looking results.
How can I determine whether the tripod is level?
Use a bubble level or small digital level to confirm balance. Take test shots and review framing. Adjust as needed. Properly leveled tripods are crucial for panoramic stitching and precise video framing.
Balancing the Camera Properly on the Tripod
Balance is as important as height and leveling. Heavy lenses may tilt forward or sideways if the weight isn’t centered. Adjust the camera mounting plate and check the tripod plate direction to maintain equilibrium. Balanced setups reduce strain on the tripod head, allow smoother pan movement, and prevent tipping in outdoor shoots.
Fixing Common Mounting Direction Problems
Sometimes, even after how to mount a camera on a tripod, the lens may face the wrong way. Misalignment can happen if the tripod plate direction is incorrect or the camera mounting plate wasn’t secured properly. To fix this, loosen the tripod lever, adjust the camera orientation, and retighten.
Ensuring proper direction prevents camera shake, uneven shots, and reduces post-editing corrections. Proper alignment is especially important for landscape photography, tripod or vlogging tripod setups, where composition matters.
Moving and Adjusting the Camera While Mounted
A well-mounted camera allows smooth pan movement and tilt adjustment. For more accurate control, use a ball head tripod or a tripod handle. Smooth adjustments prevent jerky motions in videos and ensure consistent framing for self-timer photography or remote shutter release shots.
Always adjust the center column or extend tripod legs before making extreme movements. Practicing smooth camera movement keeps shots professional, whether you are filming indoors, outdoors, or in low-light conditions with a low-light photography tripod.
Common Mistakes to Avoid When Attaching a Camera to a Tripod
Many beginners make the same mistakes during camera tripod setup. Over-tightening the tripod screw can strip threads or damage the tripod mount hole. Ignoring the tripod’s weight capacity puts the camera and tripod at risk of tipping the setup. Failing to level the tripod or incorrectly orienting the tripod mounting plate can cause misaligned or blurred shots. Paying attention to proper tripod balance, leg positioning, and mount direction ensures safe and professional photography or videography.
Over-tightening screws and locks
Tightening too much can damage threads or break the plastic mounting plate. Tighten only until the camera feels secure, then test stability with gentle nudges. Correct torque protects both your tripod and your camera.
Ignoring tripod weight limits
Every tripod has a tripod weight capacity. Using heavy DSLR lenses on a mini tripod can cause tipping. Check specifications and always match tripod strength with your equipment. Overloading reduces camera stability and increases risk outdoors.
Safely Removing the Camera After Shooting
After finishing a shoot, always remove the camera from the tripod safely. Unlock the tripod lever, hold the camera firmly, and lift straight up. Avoid twisting or sudden movements. Safe removal protects the threaded tripod mount and your gear.
After removal, store the tripod mounting plate and accessories properly. Following these steps ensures long-term tripod use and keeps your camera in perfect condition for future camera tripod mounting.
What to Do If You Don’t Have a Tripod Available
Sometimes, you might need to shoot without a tripod. In such cases, you can improvise. Use stable surfaces like tables, walls, or rocks to secure the camera on a tripod temporarily. For unusual angles, a tiny tripod or flexible tripod can be wrapped around railings, branches, or poles.
You can also employ self-timer photography or a remote shutter release to minimize camera shake. Even without a traditional tripod, understanding how to attach a camera to a tripod, like leveling and balancing, helps achieve sharp and stable shots.
Tips for Long-Term Tripod and Camera Safety
Proper care ensures your tripod lasts for years. Always clean the legs and tripod head after outdoor shoots to avoid dust and corrosion. Check leg locks and center column adjustments regularly to maintain tripod base stability.
Avoid over-tightening tripod screws and store the camera mounting plate separately if not in use. For heavy cameras or DSLRs, always respect the tripod weight capacity to prevent bending or damage. A safe and maintained setup ensures reliable camera tripod mounting and smooth camera movement for professional results every time.
Conclusion
Learning how to attach a camera to a tripod is essential for anyone serious about photography or videography. Proper setup, alignment, leveling, and balance ensure stable shots, prevent accidents, and improve image quality.
By understanding tripod components, different mounting systems, and step-by-step procedures, you can confidently mount a camera on a tripod for any situation. From landscape photography tripod sessions to vlogging tripod use, a correct camera tripod setup enhances creativity and protects your equipment.
Even in low-light or outdoor environments, applying these techniques prevents camera shake and ensures a secure tripod setup. Mastering these steps turns any shoot into a professional experience, and each small detail, from tripod plate direction to leg locks, contributes to flawless results.
FAQs
What is the thing called that connects the camera to the tripod?
It is called a camera mounting plate or tripod plate. It screws into the camera’s tripod mount hole and locks onto the tripod head.
Does a tripod fit all cameras?
Not all tripods fit every camera. Most DSLRs and mirrorless cameras use a 1/4 inch tripod screw, while some professional cameras need a 3/8 inch screw.
How does a camera sit on a tripod?
The camera sits on the tripod mounting plate, which slides into the tripod head. Once locked, it stays balanced and stable for shooting.
How to attach a phone to a tripod?
Use a phone tripod mount adapter that grips your phone. Then secure the adapter to the tripod’s 1/4 inch screw for stable shots. A flexible tripod or mini tripod can wrap around poles, branches, or railings for unique angles.
How do I attach my camera to a tripod?
First, attach the plate to the camera’s bottom, then slide the plate into the tripod head and lock the tripod lever. This secures the camera safely.
How to put a camera on a tripod without a screw?
You can use a clamp-style tripod mount or a quick-release adapter. These grips hold the camera without relying on the tripod screw.
Can any camera be put on a tripod?
Most cameras with a tripod mount hole can be attached. Compact cameras or smartphones may require special adapters or mini tripod setups.
Are all tripod screws the same?
No, there are mainly 1/4 inch tripod screws and 3/8 inch tripod screws. Choosing the right size ensures a secure and safe camera tripod setup.
How do you mount a camera without screws?
You can use clamp mounts, quick-release plates, or flexible tripod adapters. These hold the camera securely without engaging the threaded tripod mount.
Read More
Easy Steps Connecting a Security Camera with an RCA Cable to a TV
Best Camera Hard Cases for Ultimate Gear Protection
Powerful Blink Camera Batteries That Last Shockingly Long
50 Essential Parts of a Camera Every Photographer Must Know