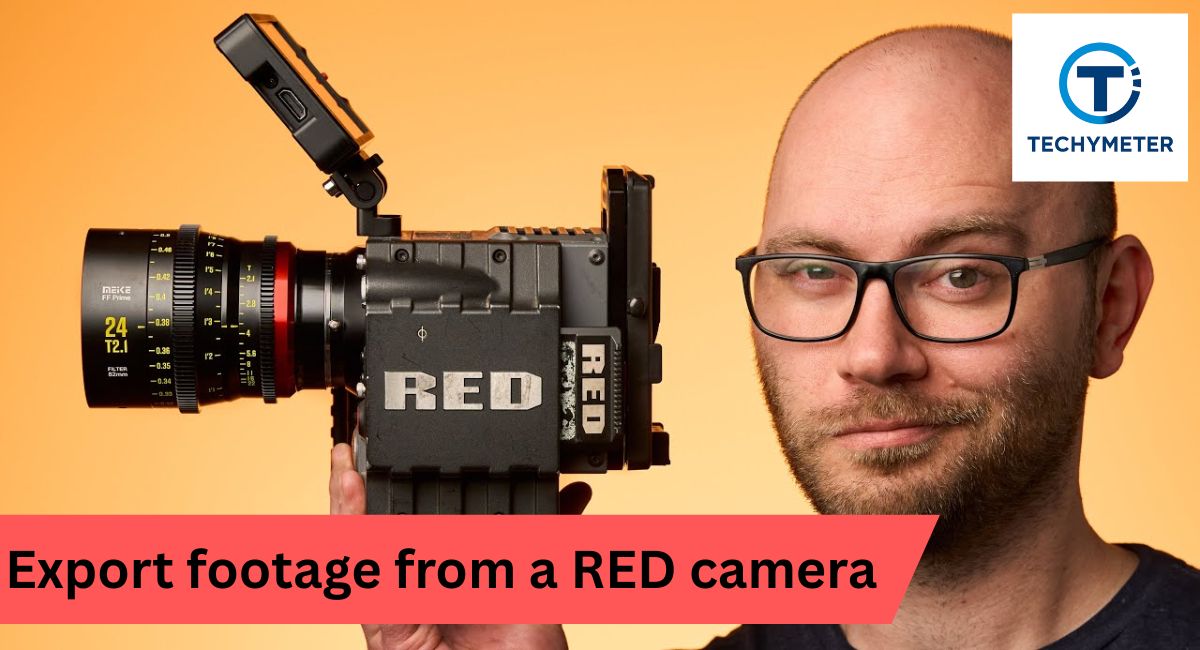
Exporting footage from a RED camera can feel intimidating, especially if you are new to working with R3D files. Whether you’re a professional filmmaker or a hobbyist, knowing how to export footage from a RED camera correctly ensures your videos retain their cinematic quality, color accuracy, and dynamic range.
In this guide, you’ll learn step-by-step techniques, the best software options, and expert tips to handle RED footage efficiently. From exporting to PC or Mac, converting for mobile, to preparing files for social media or professional editing, this article covers everything you need to master your RED camera workflow with confidence.
“Discover how to preserve quality, color accuracy, and dynamic range when exporting footage from RED camera R3D files to PC, Mac, mobile, or social media platforms.”
We talk about “exporting footage from a Red camera” in this article.
What Does It Mean to Export Footage From a RED Camera
Exporting footage from a RED camera means converting raw camera files into usable video formats. These formats can be edited, shared, or delivered to clients. Exporting is not the same as copying files. Copying keeps raw data, while exporting creates a finished video file.
When you export footage from RED camera systems, you choose resolution, codec, and color space. These decisions control how your footage looks later. A wrong export can crush highlights or shift colors. A correct export preserves the cinematic look that RED cameras are known for.
Understanding RED Camera File Formats Before Exporting
RED cameras record footage in R3D RAW files, which store sensor data instead of finished video. This gives you creative freedom during post-production. However, it also means files are heavier and need proper software to handle them.
Before you export footage from RED camera formats, you must understand how RAW differs from compressed video. RAW keeps exposure, ISO, and white balance adjustable. That flexibility is why RED footage is popular in professional filmmaking across the United States.
RAW vs Compressed Formats in RED Cameras
RAW footage records light data directly from the sensor. Compressed footage bakes settings into the image. When you export footage from RED camera RAW files, you still control color and contrast. That control disappears with compressed formats like MP4.
What Are R3D Files and Why RED Uses Them
R3D files are RED’s proprietary RAW format. They store metadata, audio, timecode, and image data together. This design helps editors maintain consistency across complex projects. It also supports non-destructive editing workflows.
RED uses R3D because it balances quality and performance. You get cinema-level detail with manageable file sizes. When you export footage from RED camera R3D files properly, you retain dynamic range, color depth, and image latitude.
Best Software to Export Footage From RED Camera
The most trusted software to export footage from RED camera systems is REDCINE-X Pro. It is developed by RED and understands R3D files perfectly. It supports Windows and macOS, making it ideal for USA-based studios.
Other professional tools include Adobe Premiere Pro, Final Cut Pro, and DaVinci Resolve. However, these tools often rely on RED plugins. REDCINE-X Pro remains the safest option when quality matters more than speed.
Common Export Software Comparison
| Software Name | R3D Support | Best For | Cost |
| REDCINE-X Pro | Native | Maximum quality exports | Free |
| Adobe Premiere Pro | Plugin-based | Editing workflows | Paid |
| DaVinci Resolve | Partial native | Color grading | Free/Paid |
REDCINE-X Pro Explained for Beginners

REDCINE-X Pro is RED’s official software for handling RAW footage. It allows you to view, adjust, and prepare clips before export. Beginners prefer it because it reads R3D files natively and applies changes without damaging the original footage.
When you export footage from a RED camera using REDCINE-X Pro, you work in a non-destructive environment. Exposure, ISO, and color space stay adjustable until export. This flexibility is essential for professional post-production workflows in the USA film industry.
How to Export Footage From RED Camera Using REDCINE-X
The export process begins by importing R3D clips into REDCINE-X Pro. Once loaded, you can review clips, trim timelines, and apply color science settings. The software uses metadata instead of baked-in changes, which protects image integrity.
To export footage from RED camera footage correctly, you choose an output format like ProRes or DNxHR. REDCINE-X then renders a new file while preserving resolution and dynamic range. This approach keeps your master files clean and reusable.
Export Footage From RED Camera R3D Files Step by Step
The step-by-step workflow follows a logical order. First, select your R3D clips. Next, apply look presets or manual adjustments. Then choose resolution, codec, and color space. Finally, export the footage to your desired destination folder.
This structured approach ensures consistency. When editors export footage from RED camera projects this way, they avoid mismatched colors or broken timelines. It also helps teams collaborate efficiently across different editing platforms.
Export Footage From RED Camera R3D Without Quality Loss
Quality loss happens when compression or color conversion is handled poorly. To avoid this, always export using high-bit-depth codecs and wide color spaces. RED footage is designed to retain detail, but only if exported correctly.
When you export footage from RED camera RAW files without quality loss, you maintain highlight detail and shadow depth. This matters for professional grading and cinema delivery. Cutting corners here often leads to irreversible image damage later.
Quality-Safe Export Settings Overview
| Setting Type | Recommended Choice | Reason |
| Codec | ProRes 422 HQ | High quality, editable |
| Color Space | REDWideGamutRGB | Maximum color data |
| Bit Depth | 10-bit or higher | Smooth gradients |
Best Export Settings for RED Camera Footage
Choosing the right settings determines how your final video looks and performs. When you export footage from RED camera files, resolution, codec, and color space work together. Incorrect combinations often result in washed-out colors or heavy compression artifacts.
Professionals typically choose ProRes or DNxHR because they strike a balance between quality and file size. Wide color spaces preserve cinematic tones. These settings help maintain image latitude, color accuracy, and detail retention across different delivery platforms.
How to Export Footage From RED Camera to PC
To export footage from a RED camera to a PC, you need software that handles RAW data efficiently. REDCINE-X Pro is optimized for Windows systems and works well with high-performance hardware setups commonly used in the USA.
Once files are imported, exporting follows the same principles as on Mac. The main difference lies in hardware acceleration. A strong GPU and fast storage significantly reduce render times when handling RED camera footage.
System Requirements for Exporting RED Camera Footage on PC
RED footage is demanding. A weak system struggles with playback and export stability. For smooth exporting, you need a modern multi-core CPU, a dedicated GPU, and plenty of RAM. Storage speed also plays a major role.
When you export footage from RED camera R3D files on PC, NVMe SSDs outperform traditional hard drives. Faster read and write speeds prevent dropped frames and export failures, especially with 4K and 8K footage.
Export Video from the Red Camera to an Android or iPhone
Mobile exports are useful for previews and client reviews. To export footage from a RED camera to a phone, you must downscale the resolution and use efficient codecs like H.264 or H.265. This keeps files small and compatible.
Although phones cannot handle RAW files directly, exported clips play smoothly when optimized. This method allows filmmakers to share RED footage quickly without sacrificing visual clarity for mobile screens.
PC Hardware Impact on Export Speed
| Hardware Component | Recommended Level | Export Benefit |
| CPU | 8-core or higher | Faster rendering |
| GPU | Dedicated graphics | Smooth decoding |
| Storage | NVMe SSD | Stable exports |
Can You Export RED Camera Footage Directly to Mobile
Direct mobile export from a RED camera is not possible. RED cameras record R3D RAW files that mobile devices cannot read or process. Phones lack the processing power and codecs required for RAW cinema footage.
To export footage from RED camera systems for mobile use, you must first convert files on a computer. Once exported into compatible formats, the footage can be transferred to phones for review, sharing, or approval purposes.
Export Footage From RED Camera for Social Media Platforms
Social media platforms apply heavy compression. When you export footage from RED camera files for social use, you must balance quality and file size. Correct aspect ratios and bitrates help preserve clarity after upload.
Most creators export RED footage in 1080p or 4K using compressed delivery codecs. This ensures faster uploads and fewer compression artifacts. Maintaining sharp edges and stable color is critical for professional presentation online.
Export Footage From RED Camera Free Using Open-Source Tools
Some editors choose free tools to export footage from RED camera footage. Applications like DaVinci Resolve Free can read R3D files with limitations. These tools work best for simple conversions and preview exports.
Free solutions are useful for learning and testing. However, they often lack advanced color science controls. This can limit creative flexibility when handling high-end RED camera RAW footage.
Limitations of Free RED Footage Export Tools
Free export tools struggle with performance and format support. Long render times and restricted output codecs are common issues. Some tools also reduce color precision, which affects grading quality.
When you export footage from RED camera R3D files using free software, the dynamic range may be clipped. For professional delivery or paid projects, these limitations often outweigh the cost savings.
Free vs Paid Export Tool Comparison
| Feature | Free Tools | Paid Tools |
| R3D Control | Limited | Full |
| Export Speed | Slow | Optimized |
| Color Accuracy | Basic | Professional |
Paid vs Free Options to Export RED Camera Footage
Paid tools give you control and reliability. When you export footage from RED camera projects using professional software, you gain access to advanced color science, faster rendering, and stable performance. These tools are designed for production deadlines.
Free tools are useful for practice. However, they limit output formats and processing speed. For client work, paid software protects image quality, color accuracy, and workflow efficiency, which matters in professional environments.
How to Batch Export RED Camera Footage Efficiently
Batch exporting saves time on large projects. Instead of exporting clips one by one, you queue them together. This approach is common in studio workflows across the USA film industry.
When you export footage from RED camera batches, the system processes files sequentially. Proper planning prevents system overload. Batch exports work best with consistent settings and sufficient storage space.
Export Footage From RED Camera for Adobe Premiere Pro
Adobe Premiere Pro supports RED workflows through plugins and native decoding. Editors often export footage from RED camera R3D files into ProRes or DNxHR for smoother editing timelines.
This method reduces CPU load during editing. It also improves playback performance. Premiere users benefit from faster scrubbing and fewer dropped frames while preserving the cinematic look.
Export Footage From RED Camera for Final Cut Pro
Final Cut Pro users typically export RED footage into Apple ProRes formats. This is in perfect harmony with Apple silicon chips and macOS optimization. The result is smooth playback and faster rendering.
When you export footage from RED camera footage for Final Cut Pro, metadata and color information remain intact. This helps editors maintain consistent grading across the entire project.
Editing Software Export Compatibility
| Editing Software | Preferred Export Format | Workflow Benefit |
| Premiere Pro | ProRes / DNxHR | Smooth timeline |
| Final Cut Pro | ProRes | Apple optimization |
Best Codec Settings When Exporting RED Camera Footage
Codecs control how video data is stored and played back. When you export footage from RED camera files, choosing the right codec prevents quality loss and editing issues. Professional editors prefer mezzanine codecs for flexibility.
ProRes and DNxHR are widely used because they preserve detail while remaining editable. These codecs handle RED camera RAW footage efficiently and keep color transitions smooth. Delivery codecs should only be used at the final stage.
How to Reduce File Size When Exporting RED Footage
RED footage produces large files by design. To reduce size, you adjust resolution, bitrate, and compression without harming visual quality. Smart downscaling keeps footage sharp while saving storage space.
When you export footage from RED camera projects for previews or sharing, compressed codecs help. The key is avoiding aggressive compression that introduces banding or noise in gradients and shadows.
Export Footage From RED Camera in 4K and 8K
High-resolution exports demand powerful hardware. Exporting 4K is manageable on modern systems, while 8K requires serious processing power. Storage speed and GPU acceleration become critical at this level.
When you export footage from a RED camera in 8K, expect longer render times. These exports are best used for archiving or high-end cinema delivery, not everyday editing workflows.
Common Errors While Exporting RED Camera Footage
Errors often occur due to mismatched settings or weak hardware. Color shifts, failed renders, and dropped frames are common complaints. These problems usually trace back to incorrect export configurations.
If you export footage from RED camera R3D files without checking color space or codec compatibility, issues appear later. Careful setup prevents costly re-exports and timeline disruptions.
Codec and Resolution Impact Overview
| Export Choice | File Size | Quality Level |
| ProRes 422 HQ | Large | Very High |
| DNxHR HQX | Large | Very High |
| H.264 | Small | Moderate |
How to Fix R3D Export Issues Quickly
Exporting R3D files can occasionally fail due to software glitches, hardware limitations, or incorrect settings. Common problems include color shifts, corrupted renders, or incomplete exports. Identifying the root cause quickly saves time and preserves quality.
When you export footage from RED camera R3D files and encounter errors, check codec compatibility, GPU drivers, and disk space first. Most issues can be solved by updating software or adjusting export parameters before retrying.
Export Footage From RED Camera for Color Grading
Color grading is essential for professional video. To export footage from the RED camera for grading, maintain RAW image data, and choose high-bit-depth formats. This preserves flexibility when adjusting shadows, highlights, and hues.
Using REDCINE-X Pro or DaVinci Resolve ensures metadata and color science are intact. Exported files remain editable, letting you achieve the cinematic look RED cameras are famous for in film productions.
Preserving Dynamic Range When Exporting RED Footage
Dynamic range preservation is critical for high-end projects. R3D files capture extensive light and shadow detail, but improper export can flatten images. Maintaining wide color spaces protects highlights and shadows.
When you export footage from RED camera RAW files, always select log or wide-gamut profiles. This ensures flexibility in post-production grading and keeps the footage consistent across monitors and devices.
Maintaining Color Accuracy After Exporting RED Footage
Color accuracy matters for client delivery and professional work. Exported files may look different on various screens if color profiles are mishandled. Matching your export settings to target display devices prevents surprises.
When you export footage from RED camera R3D files, verify that color space, gamma, and LUTs are preserved. This guarantees that your footage remains true to the original cinematic vision.
Color Export Considerations
| Aspect | Recommendation | Purpose |
| Color Space | REDWideGamutRGB | Maximum color data |
| Gamma | Log3G10 | Retain dynamic range |
| Bit Depth | 10-bit or higher | Smooth gradients |
RED Camera Footage Converter: What You Need to Know
Sometimes you need to convert RED footage for editing or delivery. A RED camera footage converter helps turn R3D files into formats like MP4, MOV, or ProRes. This is essential for compatibility with non-RED editing software.
When you export footage from a RED camera using a converter, always prioritize quality over speed. Some tools compress aggressively, which can damage dynamic range and color depth, reducing professional post-production flexibility.
Best RED Camera Footage Converter Tools Compared
Several converters are popular among USA filmmakers. REDCINE-X Pro handles native R3D conversion with maximum fidelity. DaVinci Resolve and Adobe Media Encoder offer reliable alternatives with varying export options.
Comparison is based on format support, speed, and image fidelity. Paid tools often handle batch exports and high-bit-depth conversions better, while free tools work for previews and small projects.
Convert RED R3D Files to MP4, MOV, or ProRes
Exporting to MP4 or MOV is ideal for quick sharing or client review. ProRes or DNxHR formats are preferred for editing because they retain quality. Each choice depends on workflow, delivery requirements, and software compatibility.
When you export footage from RED camera R3D files to these formats, check resolution, frame rate, and codec settings. Properly converted files allow smooth playback and maintain color integrity for editing.
Export Footage From RED Camera for Windows Users
Windows users can export RED footage efficiently with REDCINE-X Pro or DaVinci Resolve. GPU acceleration improves rendering speed, and NVMe SSD storage ensures smooth reading of large R3D files.
When exporting footage from a RED camera on Windows, consider the software version and driver compatibility. Optimized setups reduce the risk of corrupted exports and long render times.
Conversion Tool Comparison
| Tool | Supported Formats | Best For | Cost |
| REDCINE-X Pro | R3D, ProRes, DNxHR | Maximum quality | Free |
| DaVinci Resolve | R3D, MP4, MOV, ProRes | Color grading | Free/Paid |
| Adobe Media Encoder | R3D, MP4, MOV | Quick conversion | Paid |
Export Footage From RED Camera for Mac Users
Mac users often prefer Final Cut Pro and REDCINE-X Pro for RED footage exports. Apple’s ecosystem optimizes performance, especially on M1 or M2 chips, allowing smoother rendering of 4K and 8K R3D files.
When you export footage from a RED camera on a Mac, metadata, color profiles, and gamma remain intact. This ensures professional-quality output ready for editing or delivery while minimizing color shifts and timeline lag.
How Long Does It Take to Export RED Camera Footage
Export duration depends on resolution, codec, hardware, and file size. 4K footage renders faster than 8K, and GPU acceleration can reduce times dramatically. Slow drives or low RAM significantly extend export duration.
When you export footage from RED camera projects, plan accordingly. A 10-minute 8K clip may take several hours on average hardware, while optimized systems finish much faster. Understanding this helps you schedule post-production efficiently.
Storage and Backup Tips After Exporting RED Footage
Large RED files require careful storage planning. Use fast SSDs for editing and redundant drives or cloud backup for archival. Proper labeling and folder structure prevent lost footage and workflow bottlenecks.
When you export footage from a RED camera, immediately back up masters and proxies. This protects against corruption or accidental deletion and ensures smooth collaboration across teams.
Best Workflow for Exporting RED Camera Footage
A professional workflow combines preparation, correct settings, and efficient storage. Import R3D files, adjust metadata and color, select output format, and export using optimized codecs. Batch exports save time on large projects.
When you export footage from a RED camera using a structured workflow, you preserve image quality, dynamic range, and grading flexibility. This approach is standard in USA professional productions and ensures client-ready results.
Recommended Backup and Workflow Setup
| Component | Recommendation | Reason |
| Storage | NVMe SSD + RAID | Fast and redundant |
| File Structure | Organized folders | Easy retrieval |
| Backup | Cloud + Local | Safety and collaboration |
Export Footage From RED Camera for YouTube and Vimeo
When exporting for online platforms, compression and resolution are key. YouTube and Vimeo re-encode uploads, so using H.264 or H.265 at 1080p or 4K preserves quality. Avoid uploading RAW or uncompressed R3D files directly.
Exporting footage from a RED camera for social platforms requires attention to bitrate and color space. Keeping aspect ratio and gamma correct ensures your cinematic footage looks sharp and vibrant after platform compression.
Export Footage From RED Camera Without REDCINE-X
Although REDCINE-X Pro is standard, you can export RED footage without it using DaVinci Resolve or Adobe Media Encoder. These tools read R3D files and apply LUTs and color adjustments.
When you export footage from a RED camera without REDCINE-X, ensure codecs, resolution, and frame rates are set correctly. This prevents color shifts and preserves dynamic range, though some advanced RED-specific options may be unavailable.
Professional Tips to Speed Up RED Camera Exports
Optimizing hardware is the first step. Use multi-core CPUs, dedicated GPUs, and NVMe SSDs. Closing unnecessary applications and using batch exports also saves time.
Software optimization helps too. Use proxies for previews, choose efficient codecs for non-final renders, and enable GPU acceleration when available. When you export footage from RED camera efficiently, your workflow becomes faster, smoother, and more reliable.
Export Optimization Checklist
| Step | Action | Benefit |
| Hardware | Upgrade CPU/GPU/SSD | Faster exports |
| Software | Enable GPU acceleration | Smooth rendering |
| Workflow | Batch exports & proxies | Saves time on large projects |
| Format | Use ProRes/DNxHR for editing | Maintains quality |
Conclusion
Exporting footage from a RED camera is both an art and a science. With the right workflow, proper software, and attention to settings, you can preserve the cinematic quality, dynamic range, and color accuracy of your footage.
Whether you are exporting for professional editing, mobile previews, or online platforms, following structured steps ensures smooth post-production and consistent results. Investing time in learning R3D workflows, codec choices, and batch processing ultimately saves effort and enhances the quality of your final product.
By mastering REDCINE-X Pro, understanding export formats, and optimizing hardware, you can confidently handle any RED footage project. This guide equips you with the knowledge to produce client-ready videos without compromise, whether for cinema, social media, or archival purposes.
FAQs
1. What is the best way to export footage from a RED camera?
Using REDCINE-X Pro with ProRes or DNxHR codecs preserves quality and allows maximum flexibility for editing and color grading.
2. Can I export RED camera footage directly to my phone?
No, mobile devices cannot handle R3D RAW files. You must first export to a compatible format like MP4 or MOV.
3. How do I export RED R3D files without losing quality?
Select high-bit-depth codecs, maintain wide color spaces, and avoid aggressive compression during export.
4. Which software can I use besides REDCINE-X Pro?
DaVinci Resolve and Adobe Media Encoder support R3D files and provide color grading and conversion tools for professional workflows.
5. How long does it take to export RED camera footage?
Export time depends on resolution, codec, hardware, and file size. 4K exports are faster than 8K, and GPU acceleration can significantly reduce the time.
6. Can I export RED footage for YouTube or Vimeo?
Yes, use H.264 or H.265 at 1080p or 4K, maintaining proper aspect ratio and color space to prevent compression artifacts.
7. What are the system requirements for exporting RED footage?
A multi-core CPU, dedicated GPU, at least 16GB RAM, and fast NVMe SSDs are recommended for smooth playback and efficient export.
8. How do I batch export multiple RED files?
Queue your clips in REDCINE-X Pro or other software with batch export support, keeping consistent codec and resolution settings for efficiency.
9. Can I export RED footage without REDCINE-X Pro?
Yes, using DaVinci Resolve or Adobe Media Encoder is possible, but some RED-specific metadata and color options may be limited.
10. How should I store and back up exported RED footage?
Use a combination of fast SSDs for editing and redundant drives or cloud storage for archival to ensure safety and workflow reliability.
Read More
Best Cat Collar Cameras That Reveal Your Cat’s Secret Life
7 Donner Pass Cameras to Check Before Your Next Trip
Essential Facts of Point and Shoot Film Camera You Can’t Ignore
Which Moultrie Trail Camera Should You Buy? Complete Comparison Guide for USA Hunters