
Setting up a reliable home security system has never been easier with Blink cameras. Whether you want to monitor your living room, backyard, or front door, knowing how to add cameras to your Blink network ensures complete coverage and peace of mind.
This guide walks you through every step, from preparing your camera to pairing it with the Sync Module 2 setup and managing multiple devices in one Blink camera network. You’ll also learn to optimize motion detection alerts, stream video live through the Blink mobile app, and maintain a secure Blink smart home security system tailored to your home.
Learn how to add cameras to your Blink network, set up Sync Module 2, manage multiple devices, optimize motion alerts, view live streams, and maintain a reliable Blink smart home security system.
In this article, we explore “how to add cameras to your Blink network.”
Understanding the Blink Camera Ecosystem and Network Basics
Your Blink system is more than a camera. It is a complete home monitoring system. Cameras, the Sync Module, Wi-Fi, and the app talk to each other. This teamwork lets you use live view streaming, get motion detection alerts, and manage clips through cloud storage and local storage.
When you learn how to add cameras to your Blink network, you first need to know this flow. The camera sends video to the Sync Module. The module talks to your router. Then the Blink mobile app shows everything on your phone. It feels like magic. In truth, it is a smart design from Amazon Blink cameras.
Your Blink cameras are battery-powered security camera devices. They save power. They wake up only when needed. This is why a stable Wi-Fi-enabled security camera setup matters. Strong signal strength and range mean fewer drops and smoother video.
Before moving on, remember this rule. One strong network gives you smooth indoor and outdoor surveillance. A weak network causes delays. That is why good basics make the rest easy.
Blink Indoor vs Outdoor (3rd Gen): Choosing the Right Camera

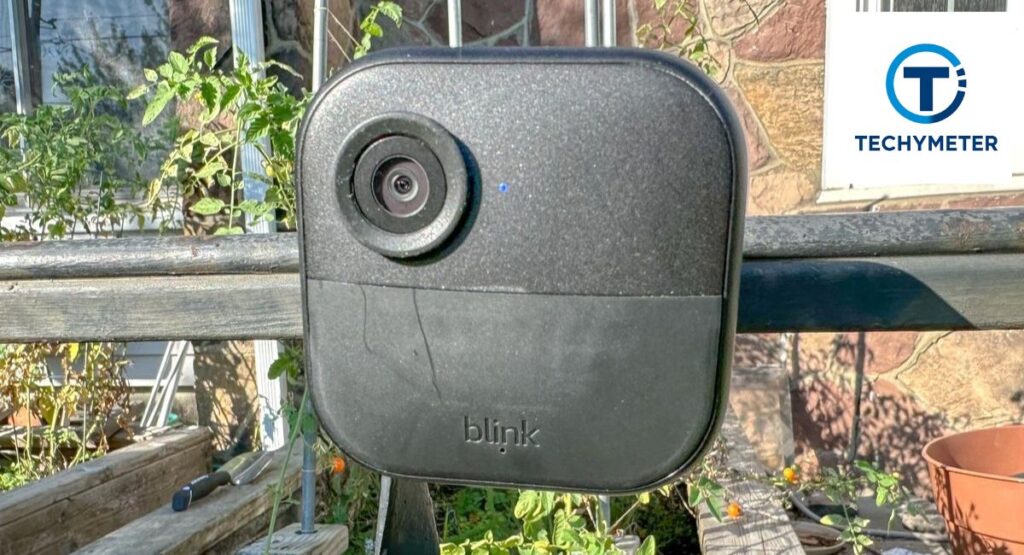
Choosing the right model feels like picking shoes. Indoor cameras are light and simple. Outdoor cameras are tough and weather-ready. When you learn how to add a Blink Outdoor camera or how to add a Blink Indoor camera, the steps are similar, but their use is different.
Blink Indoor works well in bedrooms, halls, and offices. Blink Outdoor (3rd Gen) shines at doors, yards, and garages. Both offer clear video, long battery life, and easy control in the app. Both fit into your Blink camera network with no stress.
Here is a simple table to help you decide.
| Feature | Blink Indoor | Blink Outdoor (3rd Gen) |
| Power | Battery | Battery |
| Weather use | No | Yes |
| Best for | Rooms | Doors, yards |
| Mount type | Simple | Weather mount |
| Use case | Indoor safety | Outdoor security |
For example, a family in Texas used Indoor cams for kids’ rooms and Outdoor cams for the porch. One system. Total peace. That is the beauty of a flexible Blink smart home security system.
What You Need Before Adding a Blink Camera to Your Network
Preparation saves time. Before you try to add a Blink camera to your network, make sure a few things are ready. You need a strong 2.4 GHz Wi-Fi. Most US routers support this. You also need a phone with the Blink mobile app installed.
Your Blink account should be active. Two-factor login adds safety through two-factor authentication. Fresh batteries matter too. Weak power causes errors during the Blink camera pairing process.
Many users ask, Do I need a Sync Module to add Blink cameras. In most cases, yes. The Sync Module stores clips and boosts stability. Some models work without it, but a module gives better control and video clip management.
Here is a short readiness table.
| Requirement | Why it matters |
| Wi-Fi 2.4 GHz | Camera connection |
| Blink account | System control |
| Sync Module | Storage and stability |
| Fresh batteries | Smooth setup |
| Phone app | Device control |
When these are ready, you avoid common errors and save yourself from saying Why won’t my Blink camera connect to WiFi later.
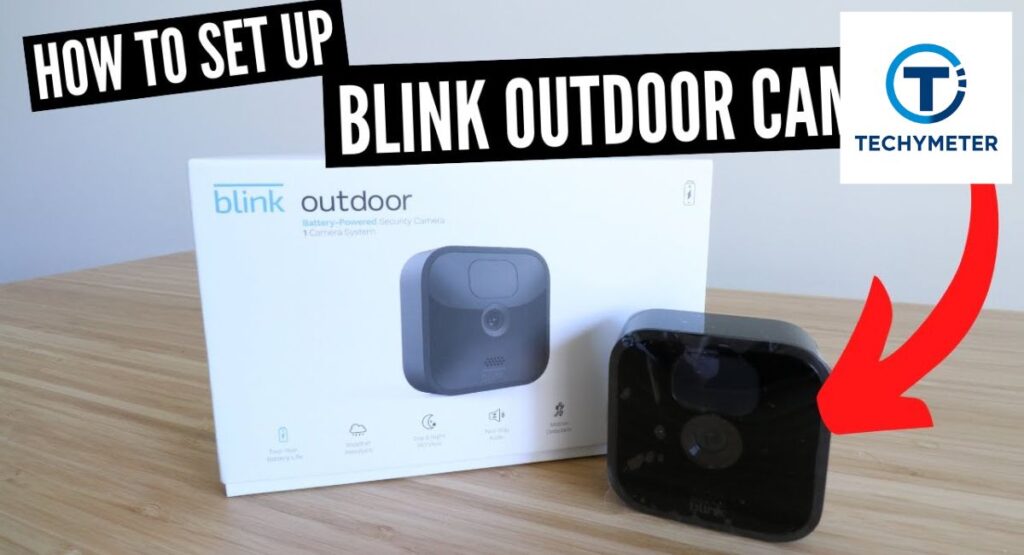
Tools, Accessories, and Box Contents Explained
Open your Blink box like a gift. Inside, you usually find the camera, mount, screws, batteries, and a small guide. These simple tools support the full Blink camera installation steps and give you many camera mounting options.
You may also want a small screwdriver and a drill if mounting outdoors. For renters, sticky mounts work well. Your Wi-Fi-enabled security camera should be positioned so that it can see well while being secure.
Here is what most boxes include.
| Item | Purpose |
| Camera unit | Records video |
| Mount | Holds camera |
| Screws | Fix mount |
| Batteries | Power |
For example, John from Florida used only the box tools to set up three cameras in one hour. No stress. That shows how simple the Blink camera setup guide really is.
Installing the Blink App and Creating Your Account

To begin, download the Blink mobile app from the App Store or Google Play. Once installed, create your Blink account using a valid email and a strong password. Activating two-factor authentication adds extra security. Your account is essential because every camera you add syncs through it.
The app also guides you step-by-step on how to add a Blink camera to your phone and how to register each device using device registration and QR code. You can set up multiple systems in one app, making it easy to expand your Blink smart home security system over time.
Setting Up Your First Blink System in the App
After creating your account, you need to set up your first system. The app asks for a system name, like “Home” or “Office,” which helps organize your Blink camera network. Each system can include multiple cameras, making it easy to manage indoor and outdoor surveillance from one hub.
During setup, the app confirms your Wi-Fi connection and checks signal strength. Strong Wi-Fi ensures live view streaming and smooth video storage in cloud storage and local storage. Once this is done, you are ready to add your cameras step by step.
How to Add a Sync Module and Create a Blink Network
The Sync Module is the backbone of your Blink system. It stores clips, manages communication between cameras, and maintains a stable Blink network setup. To add a Sync Module, plug it into a power source and connect it to Wi-Fi or Ethernet. Then follow the app instructions to register it.
Many users ask how to connect the Blink camera to the Sync Module. Every camera must pair with the Sync Module first. This ensures a smooth Blink camera pairing process, reliable alerts, and better signal strength and range. Without it, some features like cloud backup and motion recording won’t work properly.
Connecting Sync Module 2 to Wi-Fi or Ethernet
The Sync Module 2 gives extra flexibility. You can connect it to your router via Wi-Fi for standard use or Ethernet for maximum stability. The app walks you through both methods. Watching the LED lights helps confirm the connection. Green means success, red indicates an issue.
Knowing how far Blink cameras can be from the router matters here. Each camera must be within range of the Sync Module to ensure smooth live view streaming and accurate motion detection alerts. Proper placement avoids delays, and the Blink camera won’t experience connection errors.
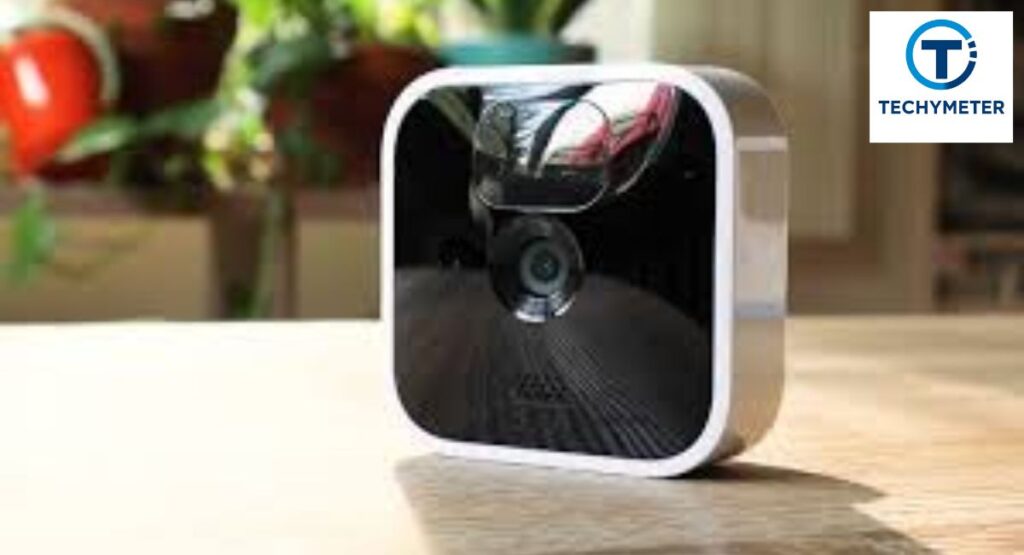
Preparing Your Blink Camera for Setup (Batteries & Back Cover)
Before pairing, ensure your camera is ready. Open the back cover carefully, insert fresh batteries, and securely close the cover. Proper battery installation prevents failures and ensures consistent performance for battery-powered security camera operation.
Checking the camera also allows you to verify firmware update status. Outdated firmware may cause errors during the Blink camera pairing process. Making these small preparations saves time and helps you smoothly add the Blink camera to your existing system.
How to Add Cameras to Your Blink Network Step by Step
Start by opening the Blink app and selecting “Add Device.” Choose your camera model and scan the device registration and QR code. The app will guide you on connecting to the Sync Module 2 and registering it in your Blink camera network.
Following these steps ensures that how to add a Blink camera to WiFi is done correctly. Once connected, your camera will be visible in the app, ready for motion detection alerts and live view streaming. This method works for both Blink Indoor cameras and Blink Outdoor cameras.
Pairing a New Blink Camera With a Sync Module
Pairing a camera is crucial for stability. After adding it to the app, place the camera near the Sync Module. Follow instructions to initiate pairing. The LED indicator will turn green when successful.
Users often ask how to pair the Blink camera with the Sync Module. Pairing ensures smooth home monitoring system operation and prevents connectivity issues. Once paired, the camera can record clips, send notifications, and integrate into your Blink smart home security system seamlessly.
Adding Another Camera to an Existing Blink System
Expanding your system is straightforward. Open the app, choose the existing system, and repeat the “Add Device” process. Whether you want to add another camera to the Blink app or extend indoor and outdoor surveillance, the steps remain the same.
It’s essential to check Wi-Fi coverage before adding more cameras. Using multiple cameras in one system enhances video clip management and ensures comprehensive monitoring. Many US homeowners successfully combine up to ten cameras for full home coverage.
How to Move a Blink Camera to a New Location
Adding a camera to a new location is simple. Open the Blink mobile app, create a new system for that location, and follow the Blink camera installation steps. You can then add Blink add-on camera devices to this system without affecting your original setup.
This process allows you to monitor multiple properties or floors. For example, a homeowner in California added cameras to the main house and a guest house. The app shows both locations separately while still maintaining motion detection alerts and live view streaming across all devices.
Adding a Blink Camera That’s Already Registered
Sometimes, cameras were previously used or belonged to another account. To add them, reset the camera, remove it from any prior account, and then follow the standard Blink camera pairing process. This ensures the camera integrates correctly with your Blink smart home security system.
Knowing how to add a Blink camera already registered avoids common errors like the Blink camera won’t connect. Resetting first also ensures smooth video clip management and prevents overlapping notifications.
How to Add Blink Outdoor and Indoor Add-On Cameras

Adding Blink Outdoor cameras or Blink Indoor cameras as add-ons is easy. Select “Add Device” in the app, scan the camera’s device registration and QR code, and pair it with your Sync Module. These cameras extend your existing Blink camera network without creating a new system.
Many US homeowners start with one indoor camera and gradually add outdoor cameras for full coverage. Proper placement ensures strong signal strength and range. This method works perfectly with the Sync Module 2 setup, allowing all cameras to communicate seamlessly.
Managing Multiple Cameras in One Blink Network

When you have several cameras, organizing them is key. Use the app to rename cameras based on location, such as “Front Door,” “Backyard,” or “Living Room.” This makes alerts and recordings easier to identify. Renaming and organizing cameras inside the Blink app improves your home monitoring system efficiency.
You can also group cameras for zones or rooms. This helps track activity, schedule recordings, and control notifications effectively. Proper management enhances motion detection alerts, simplifies live view streaming, and ensures your Blink camera network runs smoothly even as it grows.
Renaming and Organizing Cameras Inside the Blink App
Once cameras are added, naming them is essential. Open the app and rename each camera based on its location or purpose, like “Garage” or “Nursery.” Clear labels help you manage alerts, system arming and disarming, and recordings effectively.
Organizing cameras also aids video clip management. For example, a Chicago homeowner with four cameras found that renaming each saved time when reviewing live view streaming. Proper organization ensures you never confuse alerts or missed activity.
Mounting Your Blink Camera: Finding the Perfect Spot
Placement is crucial. Indoor cameras should avoid direct sunlight or reflective surfaces, while outdoor cameras need weather-protected spots. Height and angle affect motion detection alerts. Position cameras so they cover main entrances and high-traffic areas.
Camera mounting options vary from simple wall mounts to ceilings. Consider strong surfaces for outdoor cameras and stable indoor shelves. Proper placement ensures maximum signal strength and range for seamless Blink network setup.
Installing the Mount on Walls, Ceilings, and Surfaces

To mount a camera, attach the mount using screws or adhesive strips, depending on the surface type. The goal is a steady camera with a clear view. Outdoor cameras may require drilling into siding, while indoor cameras often use self-adhesive mounts for renters.
Secure mounting reduces vibrations, improves live view streaming, and ensures battery-powered security camera efficiency. Following the Blink camera installation steps carefully avoids misalignment and minimizes Blink camera not connecting issues.
How to Connect Your Blink Camera to a New Wi-Fi Network
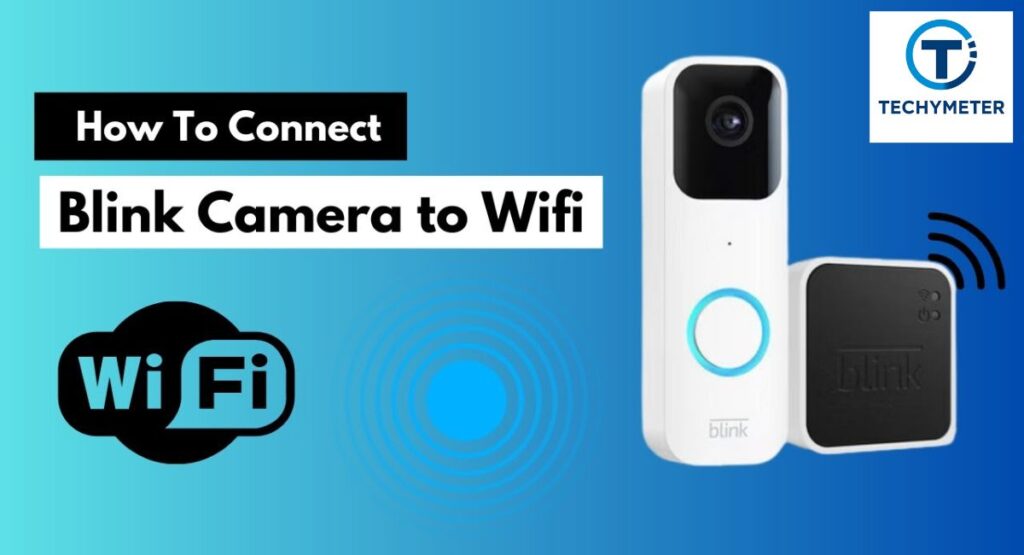
Changing Wi-Fi requires opening the Blink app, selecting the camera, and updating the network. Follow prompts to connect to your 2.4 GHz Wi-Fi or Ethernet-enabled Sync Module. This ensures smooth live view streaming and uninterrupted recording.
Many users ask why won’t my Blink camera won’t connect to WiFi. Common reasons include a weak signal, the wrong Wi-Fi band, or outdated firmware. Correcting these issues keeps your Blink camera network stable and responsive.
Setting Up Motion Detection and Alert Preferences
Motion detection is the core of your Blink system. The app allows you to adjust sensitivity, schedule alerts, and select activity zones. Proper setup ensures you get notifications only when needed. This prevents false alarms and maximizes battery life for battery-powered security camera devices.
For example, homeowners in Texas set outdoor cameras to high sensitivity at night while lowering indoor sensitivity during the day. Fine-tuning motion detection alerts ensures your home monitoring system captures real events and avoids unnecessary disturbances.
Viewing Live Feed and Recorded Clips in the Blink App
With cameras added, viewing footage is easy. Open the Blink app to access live view streaming or recorded clips. The app integrates cloud storage and local storage, so you can review the video anytime. Fast access helps respond to events quickly.
Users often ask how do I add a new camera to their Blink system and see the feed immediately. Once paired, you can watch multiple cameras at once, check activity logs, and manage recordings efficiently for full Blink camera network oversight.
How to Download and Export Blink Videos for Free
Blink allows you to save clips to your phone or computer without a subscription. Open the clip in the app and use the export option. This is essential for archiving events or sharing footage. Users often search for how to download videos from the Blink app for free, and it works for both Blink Indoor cameras and Blink Outdoor cameras.
Keeping clips locally ensures redundancy alongside cloud storage and local storage, especially useful during investigations or for insurance purposes. Proper video clip management helps maintain organized records for all your cameras.
Blink Subscription Plans and Adding Cameras to Your Plan
Blink offers Basic and Premium plans. The Plus plan covers multiple cameras and extended cloud storage. Adding new cameras may require updating your plan to maintain storage. The app guides you through this process to integrate add Blink camera to your existing system efficiently.
Subscriptions also support home monitoring system features like continuous recording and live view streaming. Understanding your Blink subscription plan ensures you can expand the Blink camera network without interruption.
How to Share Blink Camera Access With Family Members
Sharing access is simple and secure. Open the Blink app, go to system settings, and invite family members via email. You can control permission levels, such as viewing only or full access, for system arming and disarming.
This feature allows multiple people to monitor your home monitoring system simultaneously. Sharing access ensures everyone stays informed about activity, receives motion detection alerts, and can watch live view streaming anytime without logging into your account directly.
Common Setup Mistakes When Adding Blink Cameras
Even experienced users make mistakes. Common issues include using the wrong Wi-Fi band, placing cameras too far from the Sync Module 2, or skipping firmware updates. These mistakes often result in Blink camera won’t connect problems.
To prevent errors, double-check battery installation, verify signal strength and range, and ensure the Blink mobile app is updated. Avoid rushing through the Blink camera installation steps to maintain smooth operations across your Blink camera network.
Troubleshooting Blink Cameras That Won’t Connect
If a camera won’t connect, first check Wi-Fi strength and Sync Module 2 setup. Restart the camera and the app. Many users resolve the issue by resetting the camera or moving it closer to the module.
Knowing why won’t my Blink camera won’t connect to WiFi helps prevent repeated issues. A correct setup ensures reliable live view streaming, motion detection alerts, and efficient video clip management for all devices in your Blink smart home security system.
Fixing Sync Module, App, and Pairing Errors
Sync Module errors are common but fixable. Check LED indicators, reconnect to Wi-Fi, or switch to Ethernet if needed. App errors may require closing and reopening, while pairing errors often resolve with a quick reset.
Understanding how to pair the Blink camera with the Sync Module ensures smooth integration of new devices. Correct error handling guarantees your Blink camera network continues to function properly with both Blink Indoor cameras and Blink Outdoor cameras.
How to Confirm Your Blink Camera Is Successfully Added
Once paired, the app shows a green indicator, live feed, and recording options. Test motion detection alerts and check cloud storage and local storage to confirm clips are saved. This step is vital for your home monitoring system.
Verifying installation ensures that how to add a Blink camera to your network is complete. You can now expand your system, add more cameras, or move devices while maintaining stable Wi-Fi-enabled security camera connections.
Real-Life Use Cases: Expanding Home Security With Blink
Blink cameras adapt to many home setups. Families use Blink Indoor cameras for nurseries, living rooms, and offices, while Blink Outdoor cameras monitor driveways, yards, and porches. Expanding your system allows full indoor and outdoor surveillance, giving peace of mind.
For instance, a homeowner in New York started with one indoor camera. Over time, they added two outdoor cameras and another indoor camera in a guest room. This Blink camera network ensured motion detection alerts, live view streaming, and smooth video clip management across all devices.
Blink Cameras in Pakistan: Availability and Compatibility
Blink cameras are available globally, including Pakistan. However, power adapters, Wi-Fi standards, and subscription features may differ. Knowing how to add a Blink camera to your network and how to add a Blink camera to your phone ensures compatibility.
For example, using US models in Pakistan may require adapters or voltage converters. Check local Wi-Fi strength and router type to ensure proper Sync Module 2 setup. With careful setup, you can maintain full home monitoring system functionality even internationally.
When to Reset or Rebuild Your Blink Network System

Over time, networks may become slower or experience frequent connectivity issues. Signs include repeated errors with the Blink camera not connecting, lost recordings, or a failed Blink camera pairing process. Resetting or rebuilding the network restores stability.
To reset, remove cameras from the app, restart the Sync Module, and reconnect each camera. Rebuilding is useful if multiple errors persist. Doing this ensures strong signal strength and range, smooth live view streaming, and reliable motion detection alerts across your Blink camera network.
Conclusion
Setting up and expanding your Blink camera network doesn’t have to be complicated. By following this step-by-step guide, you can easily add Blink cameras to your network, pair them with Sync Module 2, optimize motion detection alerts, and manage multiple devices seamlessly through the Blink mobile app. With proper placement, Wi-Fi setup, and organization, your Blink smart home security system provides reliable indoor and outdoor surveillance, smooth live view streaming, and efficient video clip management. Taking these steps ensures peace of mind, complete coverage, and a security system that adapts as your home grows.
FAQs
1. How do I add a Blink camera to my network?
Open the Blink mobile app, select “Add Device,” scan the camera’s QR code, and follow the steps to pair with Sync Module 2. The camera will then appear in your Blink camera network.
2. Can I add more cameras to my Blink network?
Yes, you can expand your system by using the app to add multiple cameras to an existing setup. Both Blink Indoor cameras and Blink Outdoor cameras can be added seamlessly.
3. How do I pair a Blink camera with the Sync Module?
Place the camera near the Sync Module, follow the app instructions, and wait for the LED indicator to confirm a successful connection. This ensures a proper Blink camera pairing process. While Blink Outdoor cameras keep an eye on roads, yards, and porches, Blink Indoor cameras are used by families in offices, living rooms, and nurseries.
4. Why won’t my Blink camera connect to WiFi?
Common reasons include a weak signal, an incorrect Wi-Fi band, or outdated firmware. Make sure your camera is within signal strength and range and connected to 2.4 GHz Wi-Fi.
5. How to move the Blink camera to another location?
Reset the camera, remove it from the current system, and re-add it in the app at the new location. Proper placement ensures stable live view streaming and motion detection alerts.
6. How to add a Blink camera already registered?
Reset the camera, remove it from any prior account, and follow the standard setup in the Blink app. This allows it to join your Blink camera network successfully.
7. Do I need a Sync Module to add Blink cameras?
While some cameras work without it, a Sync Module provides better reliability, storage, and connectivity. Most users need it for full home monitoring system functionality.
8. Can I connect Blink to a hotspot?
Yes, but hotspot connections may reduce reliability and affect video quality. For stable Wi-Fi-enabled security camera performance, a standard router is recommended.
9. How to change the WiFi on the Blink camera?
Open the app, select the camera, and update its Wi-Fi network settings. Ensuring correct Wi-Fi helps maintain motion detection alerts and uninterrupted live view streaming.
10. How to share Blink camera access?
Invite family members through the Blink app and set permission levels. This allows multiple users to monitor your Blink smart home security system without sharing account credentials.
Read More
Camera Storage Guide: How to Protect Your Camera, Lenses, and Gear the Right Way
Camera Magnets: The Ultimate Guide for Photographers and Videographers
How Long Does a Vicohome Battery Camera Last? Complete Lifespan Guide & Deep Insights
The Ultimate Guide to Choosing the Best HDMI Cable for Security Camera Systems
Complete Guide to T Post Camera Mounts