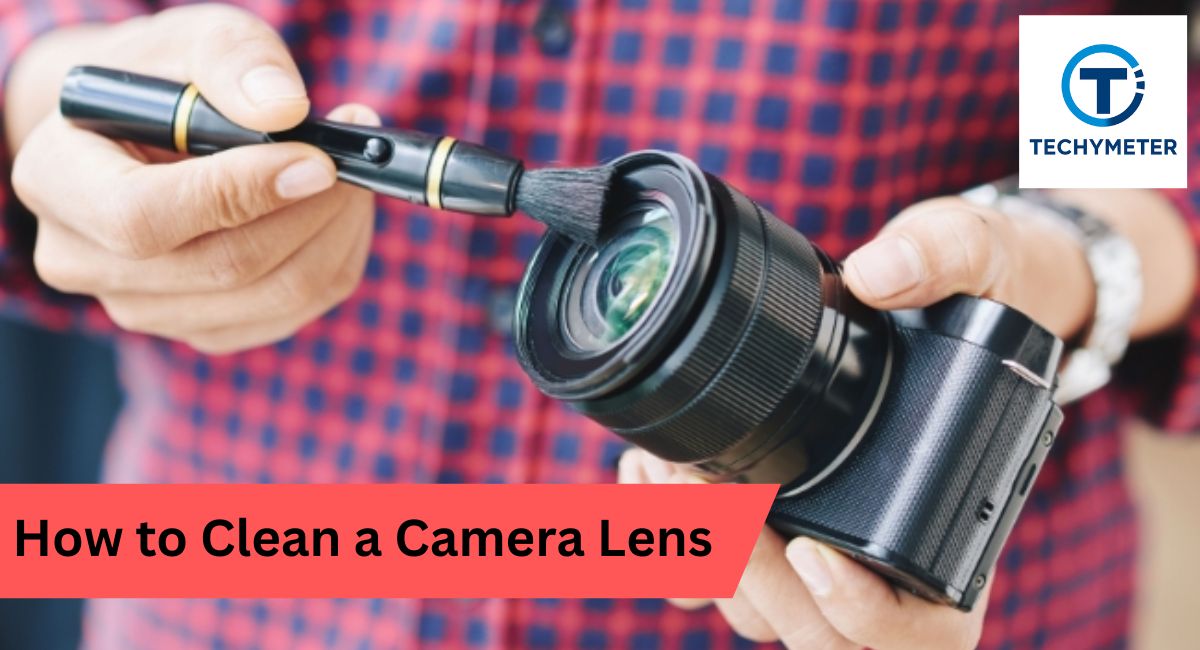
Keeping your camera lens spotless is essential for capturing sharp, vibrant, and professional-quality images. Even specks of dust, fingerprints, or smudges can reduce contrast, blur details, and subtly affect your photos. Learning how to clean a camera lens properly not only protects your expensive equipment but also ensures every shot is crisp and clear.
From using a gentle soft lens brush to applying lens cleaning solution with a microfiber cloth for lenses, understanding the right tools and techniques is key to safe camera lens maintenance. Whether you shoot with a DSLR, mirrorless camera, or smartphone, mastering lens cleaning will elevate your photography and extend the life of your gear.
Learn how to clean a camera lens safely at home using proper tools like soft lens brushes, microfiber cloths, and lens cleaning solution to remove dust, smudges, fingerprints, and maintain sharp, clear photos while protecting lens coatings, filters, and camera contacts.
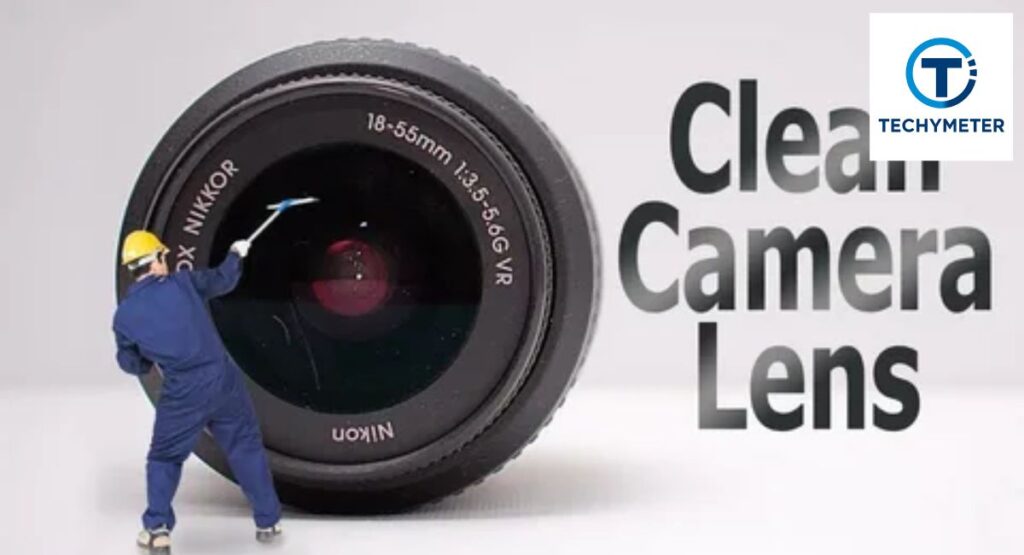
In this article, we explore “how to clean a camera lens.”
Why Proper Lens Cleaning Matters for Image Quality
A dirty lens acts like fog on a window. Light scatters. Contrast drops. Your photo loses life. Good optical lens cleaning keeps glass clear and colors true. For example, one greasy fingerprint can soften an entire portrait. That is why knowing does dust affects image quality really matters.
There is also long-term care. Modern coatings are thin. They boost light and cut glare. Rough wiping ruins them. Smart camera lens maintenance protects these layers and saves money. Think of it like brushing teeth. Small care today prevents big trouble later.
When Should You Clean Your Camera Lens (And When Not To)
Here is the truth. Not every speck needs action. A few dust dots rarely hurt photos. You clean when you see smears, oil, or haze. Ask yourself how often you should clean a lens. The answer is simple. Only when dirt is visible.
Many pros repeat one rule. Avoid unnecessary lens cleaning. Every wipe is contact. Contact brings risk. Clean after beach shoots, kids’ fingerprints, or rain spots. Otherwise, cap the lens. Store it well. Let it rest.
Preparing a Dust-Free Environment Before Cleaning
Start with space. Choose a quiet indoor room. Turn off fans. Close windows. This helps with how to remove dust from the camera lens efforts succeed. Dust in the air loves wet glass. A calm room keeps new grit away.
Place your gear on a clean table. Wash your hands. Keep caps ready. This simple setup makes a clean camera lens feel easy. Think of it like cooking. A tidy kitchen makes better food. A tidy space makes safer cleaning.
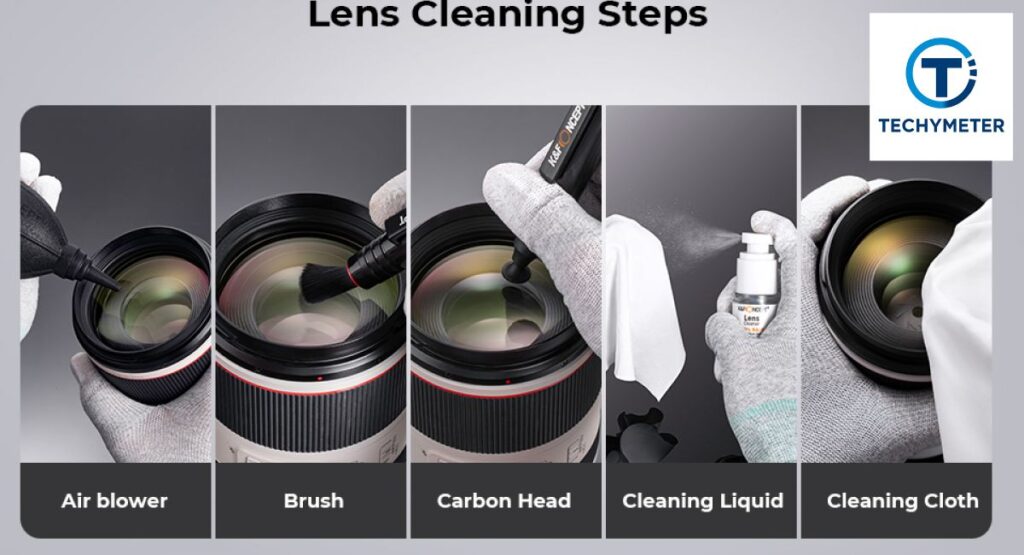
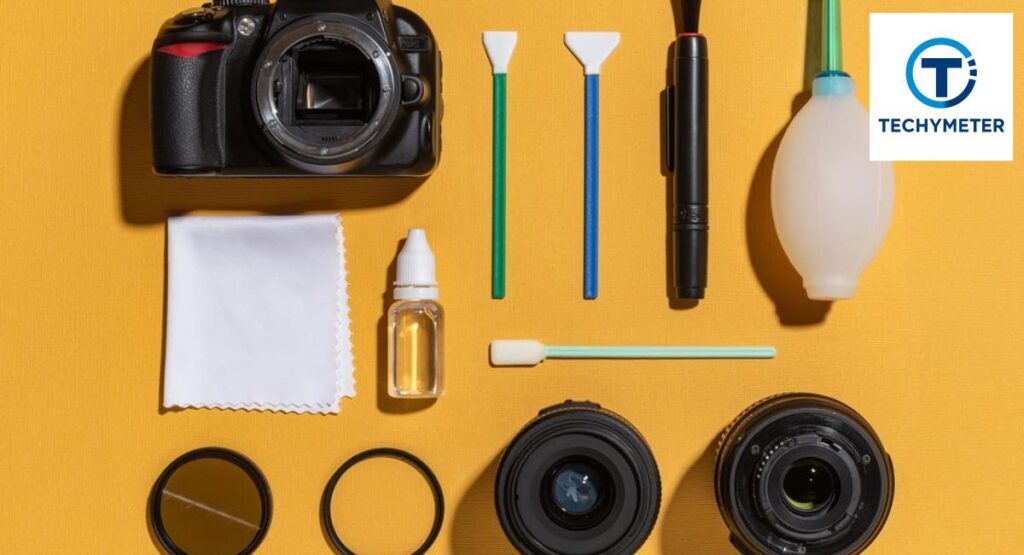
Essential Tools for Safe Lens Cleaning at Home
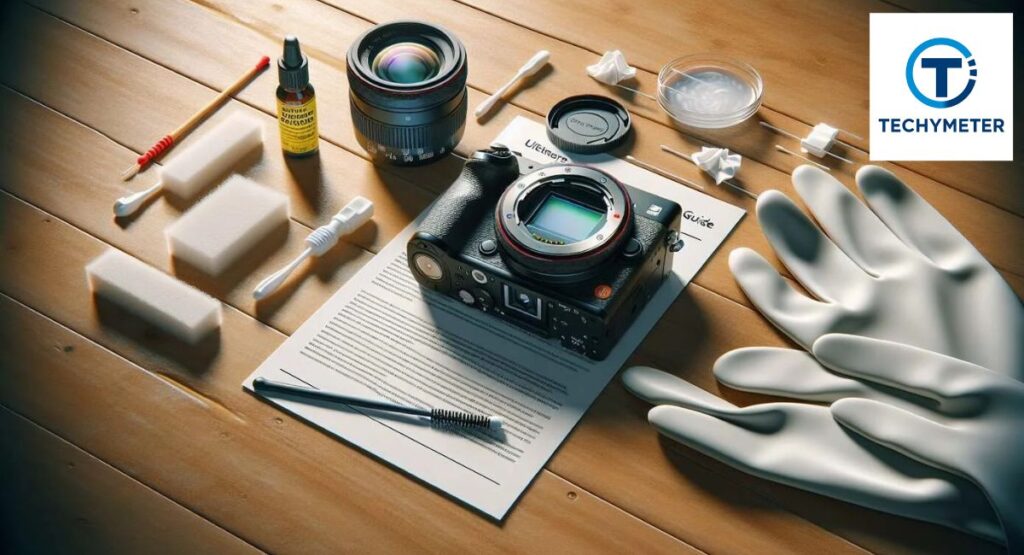
Great results need the right gear. Your basic lens cleaning tools include a blower, a brush, a cloth, and liquid. A small lens cleaning kit covers most needs. At home, these tools turn lens cleaning at home into a safe routine.
Below is a simple table to guide you. It fits both DSLR lens cleaning and mirrorless lens cleaning work.
| Tool | Purpose | Why It Matters |
| air blower for camera lens | Blows loose dust away | Prevents scratches before wiping |
| soft lens brush or camel hair lens brush | Lifts stuck particles | Gentle on coatings |
| microfiber cloth for lenses | Wipes oils and smears | Leaves no lint |
| lens cleaning tissue | One-time wipes | Avoids dirt transfer |
| lens cleaning solution | Dissolves oil | Safe for coatings |
| LensPen lens cleaner | Targets stubborn spots | Handy in the field |
Choose quality. Cheap clothes shed fibers. Good tools last for years.
Understanding Different Lens Surfaces and Coatings
Not all glass is equal. The front lens element faces the wind and fingers. The rear lens element sits near the sensor. Dirt here hits image quality harder. Knowing this helps with how to clean the rear lens element areas with extra care.
Most lenses use special layers for light control. This is lens coating protection in action. These coatings hate harsh chemicals and rough cloths. Treat them like eyeglasses. Gentle touch. Clean only when needed.
The Correct Order: From Dry Cleaning to Wet Cleaning
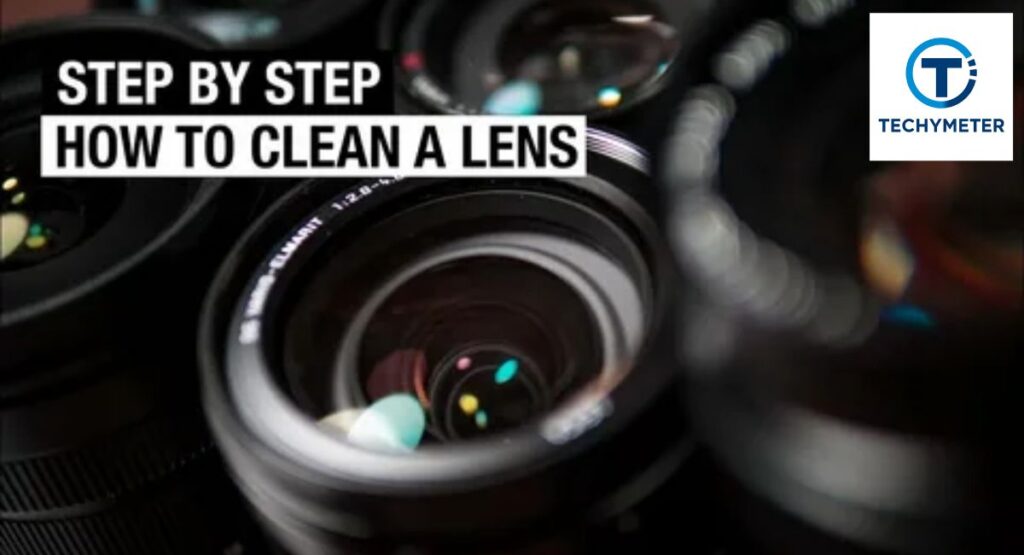
Order matters. Always start dry. Remove dust first. Then use liquid only if the smears stay. This three-step lens cleaning process cuts risk and saves coatings. Dry air, soft brush, then gentle wipe. Simple. Safe.
Remember one golden line. Apply the solution to the cloth, not the lens. Liquid on the glass can creep inside. It can stain edges. Keep moisture on the fabric. Then wipe. You control the clean.
Choose a Clean Environment
Before touching glass, pause. Look around. Pick a still room with good light. This makes how to clean the camera lens at home safer and calmer. You see dirt clearly. You avoid new dust. It feels small. It makes a big difference.
Remove Dust and Debris
Hold the lens facing down. Use your blower. This is the core of how to remove dust from a camera lens without harm. Never use your breath. Moist air brings spots. Let clean air do the work.
Use a Soft Brush
Now, take your soft lens brush. Sweep lightly from the center outward. Do not press. Think of brushing crumbs off a table. This step prepares glass for safe wiping and helps to prevent lens scratches.
Apply Lens Cleaning Solution
Put one or two drops of lens cleaning solution on a cloth. Do not flood it. Ask yourself best cleaner for camera lenses? The answer is simple. Use products made for optics. They respect coatings.
Gently Wipe the Lens
Wipe in slow circles. Always clean the lens from the center outward. This pushes dirt away from the image core. It also answers how to remove smudges from the lens and how to clean fingerprints on the lens with care.
Dry with a Dry Microfiber Cloth
Switch to a dry side. Buff softly. This shows how to dry a camera lens safely without streaks. Stop when the glass shines. More rubbing brings risk. Less is more.
Inspect the Lens
Tilt the lens under the light. Look for haze or marks. This teaches how to inspect a lens for dust like a pro. If a spot stays, repeat gently. Never rush.
How to Remove Loose Dust with Blowers and Brushes
Dust looks harmless. However, tiny grains act like sandpaper on glass. That is why how to remove dust from a camera lens always starts with air. A good air blower for a camera lens sends clean puffs that lift grit without touching the surface. It keeps your glass safe before any wipe.
Brushes help when dust clings. A soft lens brush or camel hair lens brush gently sweeps leftovers away. Never touch bristles with fingers. Oils transfer fast. Keep the brush capped. This habit improves camera lens cleaning and extends the life of your tools.
Using Lens Cleaning Liquid the Right Way
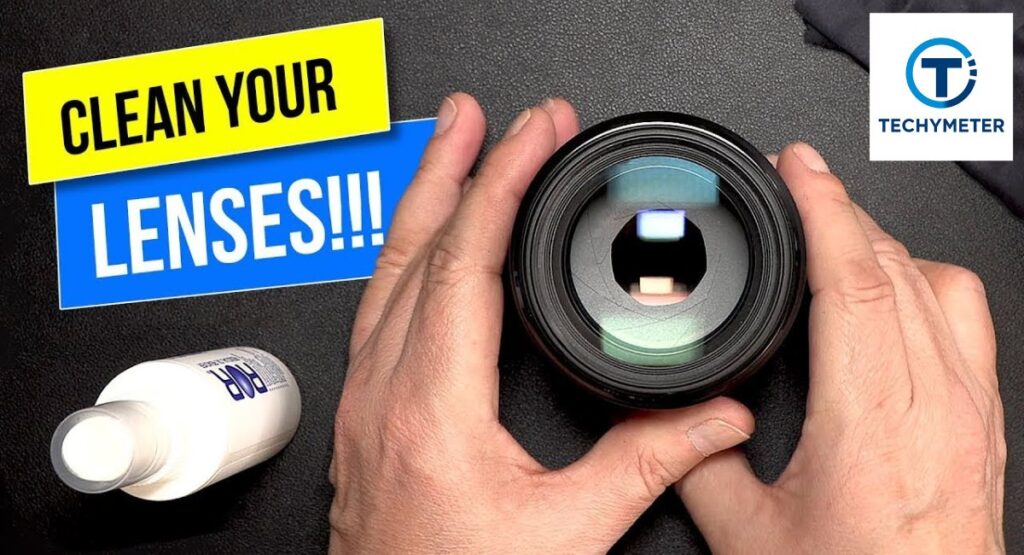
Liquid solves what air cannot. Oil, sunscreen, and sticky marks need help. A proper lens cleaning solution breaks grease without harming coatings. Many photographers ask best cleaner for camera lenses. The answer is simple. Use optics-safe formulas only.
Always remember to apply the solution to the cloth, not the lens. Put one or two drops on your microfiber cloth for lenses or lens cleaning tissue. Too much liquid can seep into the edges. Keep it light. Keep it controlled. This is smart, clean camera lens safety practice.
Wiping Techniques That Prevent Scratches and Streaks
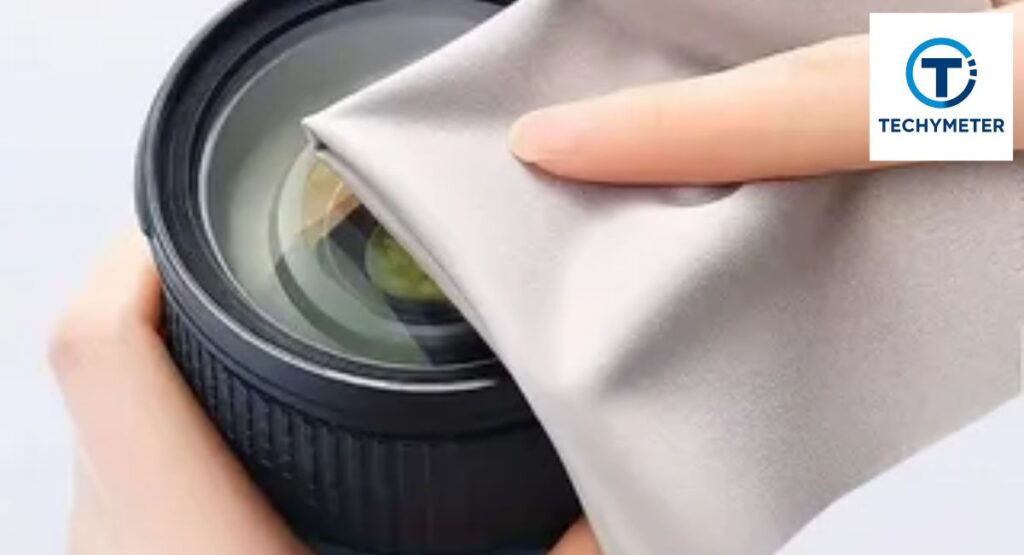
How you wipe matters as much as what you use. Move in slow circles. Always clean the lens from the center outward. This pushes dirt away from the image core and avoids streaks.
Use gentle pressure. Let the cloth do the work. Think of polishing a watch face. Soft. Calm. This technique answers how to prevent lens scratches and keeps your glass shining after every optical lens cleaning session.
How to Deal with Fingerprints, Smudges, and Oil Marks
Fingerprints hold oil. Oil loves glass. One touch can ruin contrast. That is why many ask how to remove smudges from the lens and how to clean fingerprints on the lens after shoots with kids or crowds.
For stubborn spots, try a LensPen lens cleaner. Its tip grips oily marks that cloths miss. For example, a wedding shooter saved a filter after cake smears using a LensPen. Slow strokes. Light touch. Problem gone.
Cleaning Rear Lens Elements and Camera Contacts Safely
The rear lens element is one of the most sensitive parts of your camera. Sitting close to the sensor, it captures light in a precise way. Even specks of dust, fingerprints, or smudges can scatter light and reduce image sharpness significantly. That is why knowing how to clean the rear lens element requires extra caution and a deliberate approach.
Start by using a gentle air blower for the camera lens to remove loose dust particles. Avoid touching the surface directly with your fingers. After that, lightly wipe with a barely damp microfiber cloth for lenses or a lens cleaning tissue. Use slow, circular motions, starting from the center and moving outward, which ensures that any remaining dirt is pushed away from the optical center rather than smeared across the glass.
Additionally, it is important to inspect your camera’s mounts and contacts. The pins and metal contacts connect your lens to the camera body and facilitate communication for autofocus and aperture control. Carefully clean lens contacts using a dry, clean cloth. Avoid using any liquid near these contacts to prevent corrosion or conductivity issues.
Keeping both the rear lens element and contacts clean protects your digital camera lens care, ensures your autofocus performs correctly, and maintains image quality over the long term. Neglecting this step may lead to subtle image degradation or connection problems over time.
How to Clean Camera Filters Without Damaging Them
Camera filters, such as UV or protective filters, are designed to shield your expensive lens glass from dust, scratches, and minor impacts. A protective lens filter often takes the brunt of environmental hazards like sand, rain, and fingerprints, sparing the lens itself. Cleaning filters is surprisingly similar to cleaning the lens.
Use a gentle soft lens brush or LensPen lens cleaner to remove loose dust first. Then apply a tiny amount of lens cleaning solution to a lens cleaning tissue or microfiber cloth for lenses and gently wipe in concentric circles. Start from the center and move outward for the best results, ensuring that no streaks or scratches form on the surface.
Many photographers make it a habit to perform regular UV filter cleaning instead of touching the lens glass directly. Filters are significantly cheaper to replace than lenses, and cleaning them frequently prevents the buildup of oils or debris. If you notice scratches or persistent smudges, it’s often more practical to replace the filter rather than risk damaging the lens beneath.
Fixing a Blurry Lens: Causes and Cleaning Solutions
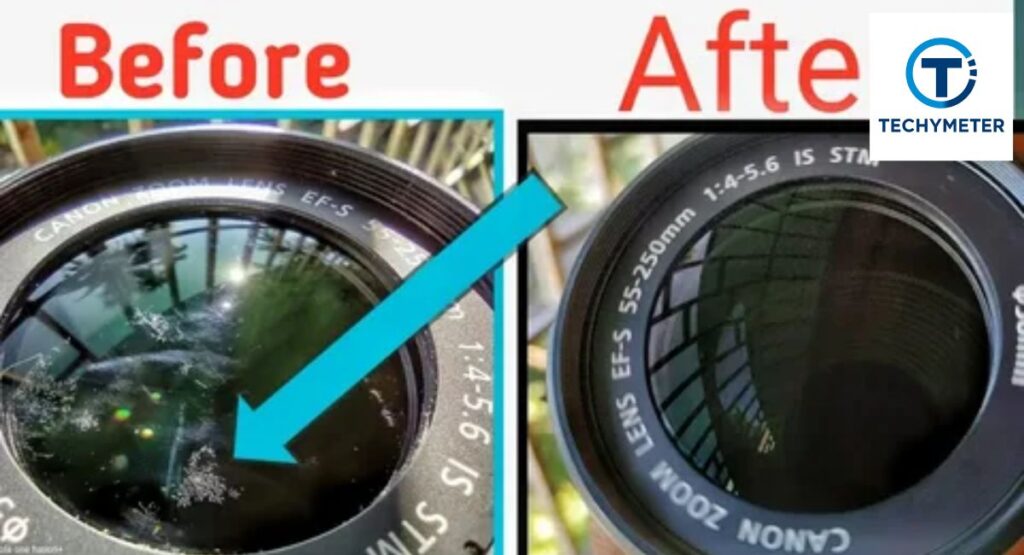
Blurry photos are frustrating, especially when you know your subject is sharp in real life. One of the most common causes of blur is dirt, smudges, or fingerprints on the lens surface. Oils scatter light, reducing contrast and sharpness, which is why many photographers search how to clean a blurry camera lens when images appear hazy.
Begin by inspecting the lens carefully under good lighting. Clean the front lens element using the three-step lens cleaning process: remove dust with a blower, brush off remaining particles with a soft lens brush, and finally wipe with lens cleaning solution applied to a microfiber cloth for lenses.
However, not all blur is caused by surface dirt. Internal haze, fogging from humidity, or even misfocused shots can produce similar effects. After cleaning the exterior thoroughly, take a test shot. If the blur persists, it may indicate deeper issues such as fungus, dust inside lens elements, or optical misalignment.
While cleaning the outside will not fix internal issues, it rules out one of the easiest and most common causes, and it gives you a baseline for evaluating whether professional lens cleaning is needed.
How to Clean Fungus Inside a Camera Lens
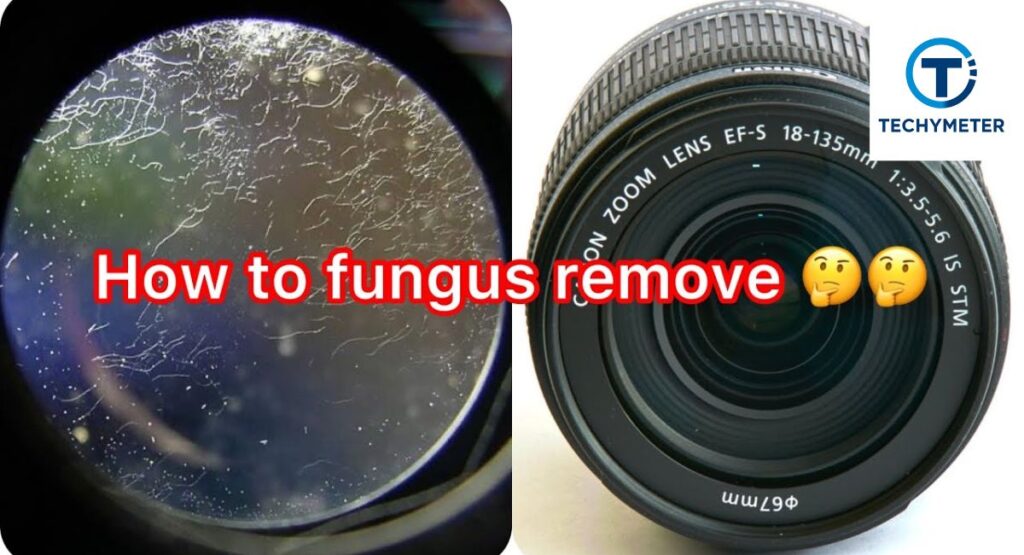
Fungus inside a lens appears like fine spider webs trapped between the glass elements. It thrives in damp, dark environments, and unfortunately, wiping the exterior will not remove it. Fungus grows slowly but can permanently etch coatings or soften adhesives over time, degrading image quality.
This is where home cleaning stops. Attempting to disassemble a lens without proper knowledge can permanently damage its delicate internal mechanisms. Fungus removal requires professional lens cleaning in a controlled, sterile environment. Technicians use specialized cleaning solutions, ultrasonic treatments, and clean-room assembly to eradicate fungal growth without harming coatings or glass.
At home, your best defense is prevention: store lenses in dry places with silica gel packs, avoid humid storage, and keep protective filters on. Preventing fungus is far easier than curing it, making simple camera lens maintenance habits essential for long-term lens health.
Cleaning Inside the Lens: What You Can and Can’t Do
Many photographers are tempted to clean inside the lens, hoping to remove dust or smudges. The reality is simple: do not attempt it unless trained. Lenses contain springs, shims, seals, and multiple glass elements aligned to precise tolerances. Even a small slip can misalign optics or ruin focus. This is why internal cleaning is strictly a job for professional lens cleaning services.
What you can do at home is clean the outer glass and the camera lens barrel. Wipe carefully using lens cleaning solution and a microfiber cloth for lenses to remove grime. Avoid harsh liquids or excessive force. Maintaining clean exterior elements, the barrel, and mounts while leaving the interior untouched ensures safe camera lens maintenance and stress-free handling.
Phone Camera Lens Cleaning: Android and iPhone Guide
Phone cameras are often overlooked in cleaning routines, yet their lenses are just as sensitive. Phones sit in pockets, bags, and hands all day, collecting lint, oil, and fingerprints. Learning how to clean a camera lens on your smartphone is critical to keeping mobile photography crisp and clear.
Start with a gentle air blower for the camera lens or tap lightly with a soft cloth. Wipe in tiny circles to remove fingerprints and smudges. Avoid sharp objects that could scratch the delicate lens cover. A lens cleaning tissue or a clean microfiber cloth is sufficient.
Doing this regularly keeps mobile shots sharp and color accurate while supporting everyday digital camera lens care. Remember, treating phone lenses like mini DSLR optics prevents permanent scratches and ensures your iPhone or Android captures high-quality images every time.
Is Alcohol or Household Cleaner Safe for Lenses?
Many photographers ask if alcohol is safe for the camera lens, or if I can use isopropyl alcohol on the lens. Low-strength alcohol may work in emergencies, such as stubborn grease or fingerprints, but repeated use can slowly degrade lens coatings. Household cleaners like window sprays or acetone are strictly off-limits. They strip coatings, leave streaks, and may harm plastic or rubber components.
If you wonder what not to use on a camera lens, remember this: only optics-safe liquids like lens cleaning solution or deionized water should touch glass. Always apply the liquid to a microfiber cloth for lenses or lens cleaning tissue, never directly onto the lens. This method ensures safe cleaning while preserving lens coating protection and maintaining image quality.
What to Do If You Don’t Have a Microfiber Cloth
Sometimes you find yourself in the field without a proper cloth or lens cleaning kit. This is where improvisation comes in. People ask clean lens without a microfiber cloth for emergencies. In such cases, use a clean corner of a 100% cotton shirt or a fresh lens cleaning tissue. Lightly breathe on the lens to create a small fog. Then wipe gently in circular motions to lift oils or fingerprints.
This technique is safe for short-term fixes, but should be replaced with a proper microfiber cloth for lenses as soon as possible. Even professional photographers practice how to clean a lens in the field for quick adjustments. Remember, the goal is always to minimize contact and prevent scratches while keeping your images sharp.
Common Lens Cleaning Mistakes You Must Avoid

Most damage comes from haste and lack of care. Common mistakes include rubbing dust without a blower, using a dirty cloth, spraying liquid directly on glass, or over-cleaning lenses. These errors are easy to make but can scratch coatings, reduce clarity, and shorten the life of your lens.
A frequent tip is to avoid unnecessary lens cleaning. Only clean when visible dirt, smudges, or fingerprints appear. Always use clean tools and gentle pressure. Cap your lenses and store them in dry conditions. Following these habits protects coatings, maintains camera lens barrel cleaning, and ensures every photo remains crisp and professional.
Professional Lens Cleaning Cost and When to Seek Service
Sometimes, DIY methods cannot resolve deeper issues. Fungus, haze, or internal dust requires trained technicians. In the USA, professional lens cleaning costs range from $50 to $150, depending on the lens and the level of service needed.
Basic exterior cleaning generally costs $40–$60. Internal dust removal may be $80–$120, while fungus treatment can reach $150. Seek professional care when dirt persists, blur remains after proper camera lens cleaning, or fungus appears. Investing in expert service ensures optical elements and coatings are preserved, saving money on lens replacement over time.
Conclusion
Maintaining a clean camera lens is essential for achieving sharp, vibrant, and professional-quality images. Whether you shoot with a DSLR, mirrorless camera, or smartphone, knowing how to clean a camera lens at home and when to seek professional lens cleaning can save both your photos and your equipment.
Using proper lens cleaning tools, including a microfiber cloth for lenses, a soft lens brush, an air blower for camera lenses, and a lens cleaning solution, ensures you can safely remove dust, smudges, and fingerprints without damaging lens coatings.
Following the three-step lens cleaning process—removing dust, brushing, and gentle wiping—protects your optics while maintaining image clarity. Remember to clean rear lens elements, filters, and camera lens barrels carefully, avoid over-cleaning, and use protective lens filters whenever possible.
By practicing good camera lens maintenance, you extend the life of your gear, prevent costly repairs, and ensure every shot is crisp, clear, and free from artifacts. Clean lenses are the foundation of great photography, and consistent care pays off in every photo you take.
FAQs
Q1: How should a camera lens be cleaned?
The safest method is the three-step lens cleaning process: remove dust with an air blower for the camera lens, brush with a soft lens brush, and gently wipe with lens cleaning solution on a microfiber cloth for lenses.
Q2: How often should you clean a lens?
Only clean when necessary. Avoid unnecessary lens cleaning to prevent scratches or coating damage. Dust alone rarely affects photos, but fingerprints, smudges, or oil marks require attention.
Q3: Is alcohol safe for the camera lens?
Low-strength isopropyl alcohol can work in emergencies, but repeated use may harm lens coating protection. Never use household cleaners, window sprays, or acetone. Always prefer lens cleaning solution.
Q4: How do I clean rear lens elements safely?
Use a blower first, then a lightly dampened microfiber cloth for lenses. Avoid touching the rear lens element directly with fingers. Clean lens contacts separately with a dry cloth.
Q5: Can I clean camera filters without damaging them?
Yes, use gentle circular wipes with a lens cleaning tissue or microfiber cloth for lenses. Regular UV filter cleaning protects your lens, and scratched filters are easier and cheaper to replace than lenses.
Q6: How can I clean a blurry camera lens?
Blurry images may result from dirt, smudges, or fingerprints. Clean the front lens element with a blower, brush, and lens cleaning solution. Persistent blur may indicate internal dust or fungus, requiring professional lens cleaning.
Q7: Can I clean my phone camera lens the same way as DSLR lenses?
Yes, use a soft cloth or lens cleaning tissue, wiping in small circular motions. Avoid sharp objects or excessive pressure. This is how to clean a camera lens on Android or iPhone safely.
Q8: What should I do if I don’t have a microfiber cloth?
Use a clean 100% cotton shirt or fresh lens cleaning tissue in emergencies. Breathe lightly on the lens to fog it, then wipe gently. Replace with a proper cloth as soon as possible.
Q9: How can I prevent lens scratches?
Always use soft, clean materials like a microfiber cloth for lenses. Avoid touching glass directly, keep lenses capped, and use a protective lens filter to shield the glass from dust and impacts.
Q10: When should I seek professional lens cleaning?
If fungus, internal haze, or stubborn dust persists after cleaning, seek professional lens cleaning. Costs in the USA typically range from $50–$150, depending on service type and lens complexity.
Read More
How to Add Cameras to Your Blink Network: Complete Step-by-Step Guide
Camera Storage Guide: How to Protect Your Camera, Lenses, and Gear the Right Way
Best Veo Camera Alternatives for Football and Soccer Clubs
Can You Fight a Red Light Ticket by Camera in Scottsdale? Complete Legal Guide